Brick edging might sound like a minor detail, yet it is the secret ingredient that makes a garden look finished, controls wayward turf, and even solves drainage issues. Over two decades of design work have taught me that the humble brick can morph from understated trim to headline feature with nothing more than a change in pattern, height, or color. Below you’ll find a toolbox of creative approaches — from time-tested classics to high-tech innovations — that suit tight budgets, DIY weekends, or professional builds alike. Ready to turn raw borders into polished frames? Let’s explore possibilities that will keep your landscape tidy and distinct.
1. Classic Soldier-Course Brick Edging
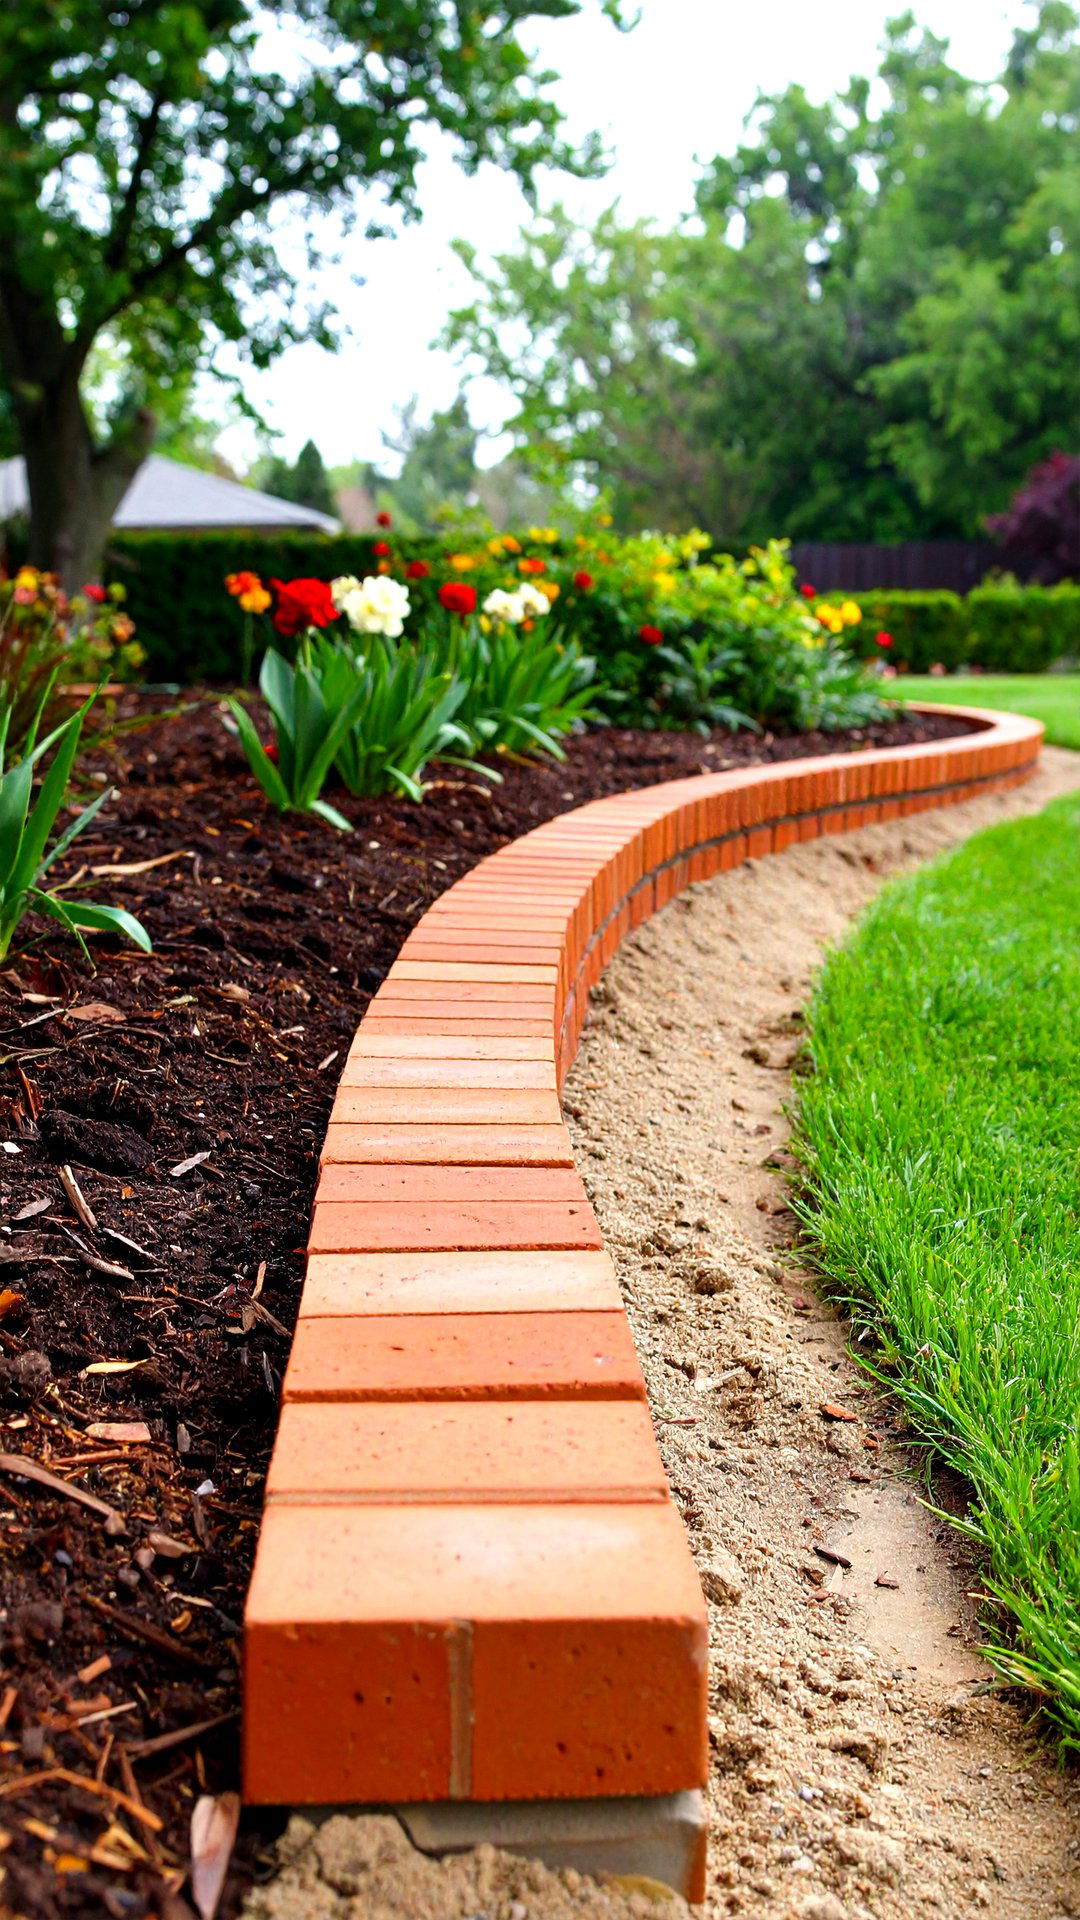
A row of upright bricks, known as a soldier course, delivers instant crispness to any border. By burying one-third of each unit in a shallow trench, the remaining tops form a neat miniature wall that stops turf creep and keeps mulch in place. Because every brick stands vertically, curves are easy — just tilt slightly to follow the line. Beginners love the forgiving installation: tamp a level sand base, press the bricks in, and backfill with soil. Finish by sweeping sand into joints and watering to settle everything. Your brick edging now looks professionally laid yet costs only sweat equity.
2. Basket-Weave Brick Edging Border
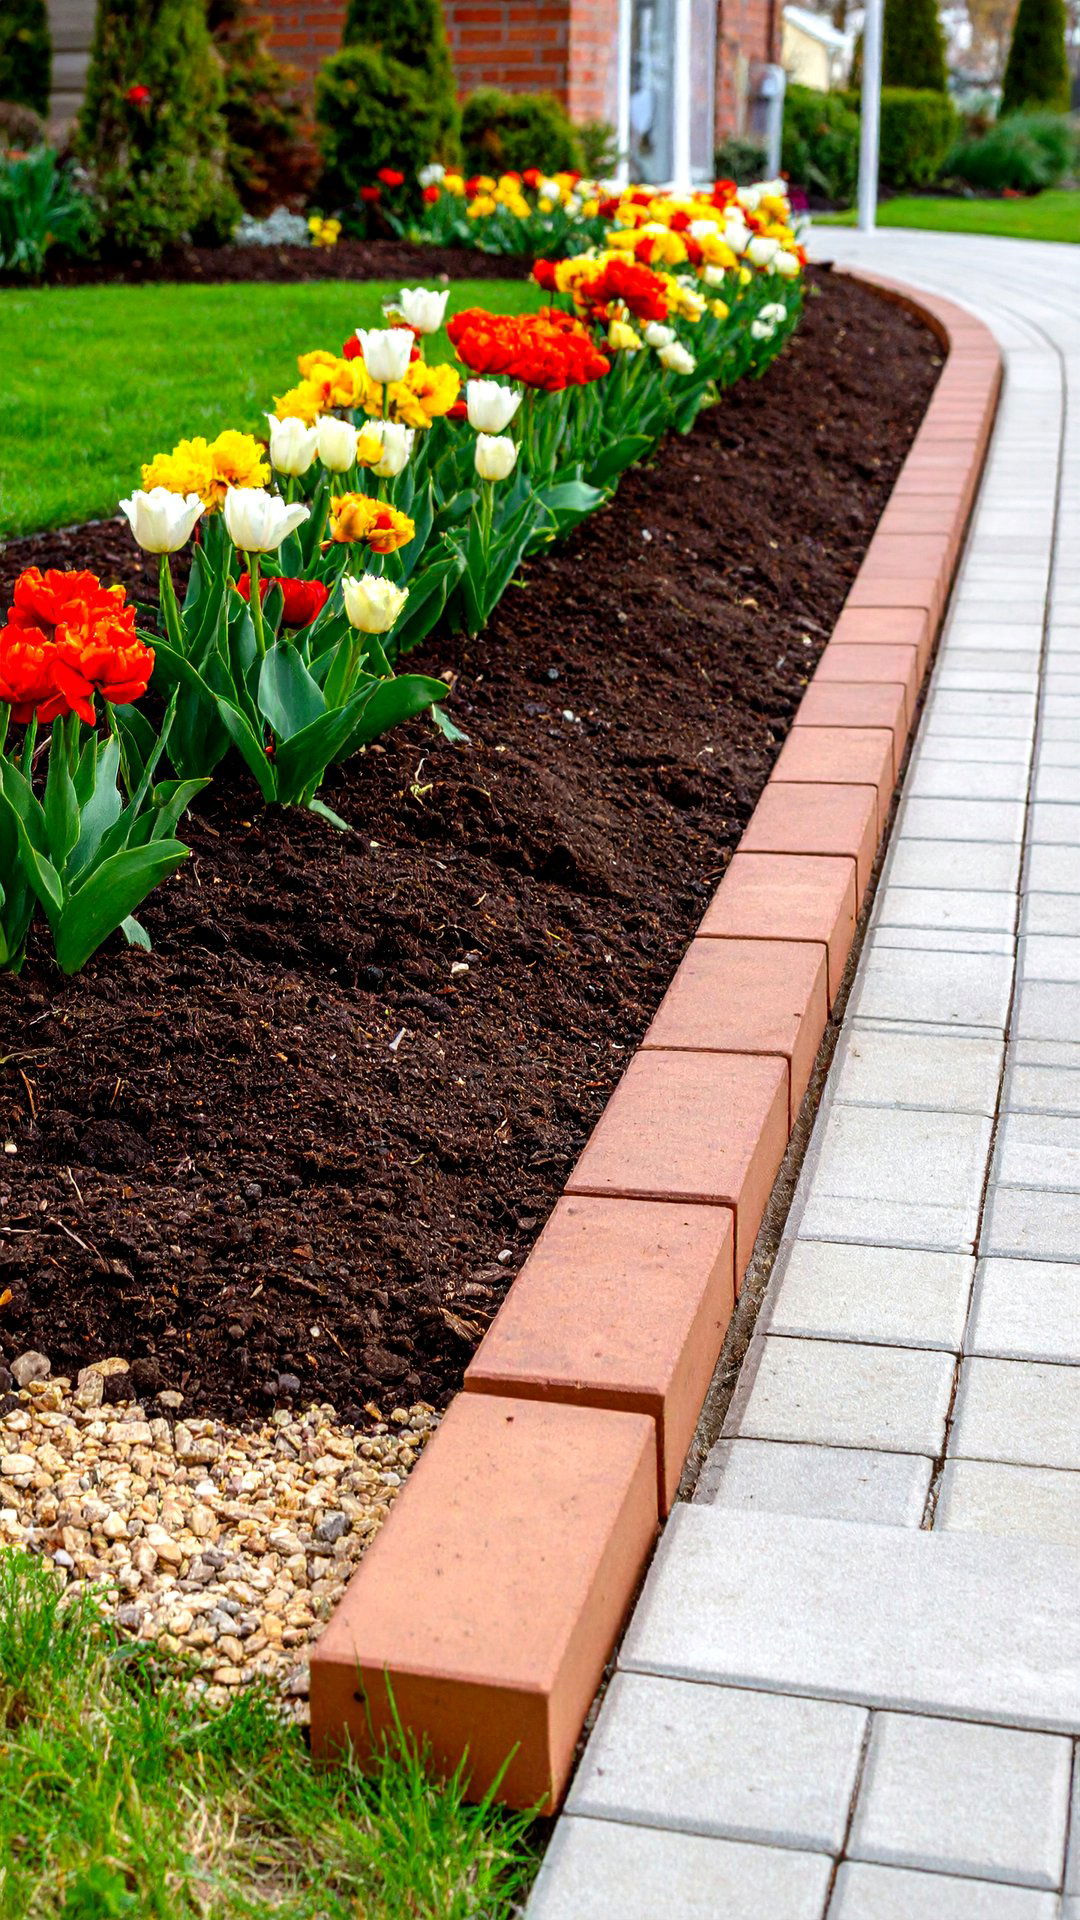
Unlike straight lines, a basket-weave brick edging pattern instantly adds texture and movement to a flower bed. Lay pairs of bricks side-by-side, alternating orientation every other pair so the border appears to interlace like a picnic basket. Because bricks sit flat, this style doubles as a small walkway for foot traffic while clearly defining soil and lawn. Dig a trench the width of two bricks, add compacted gravel and sand, then set your units snugly before tapping level with a mallet. Sweep jointing sand to lock them together and resist frost heave. The finished brick edging offers artisanal charm for pennies.
3. Curved Serpentine Brick Edging Line
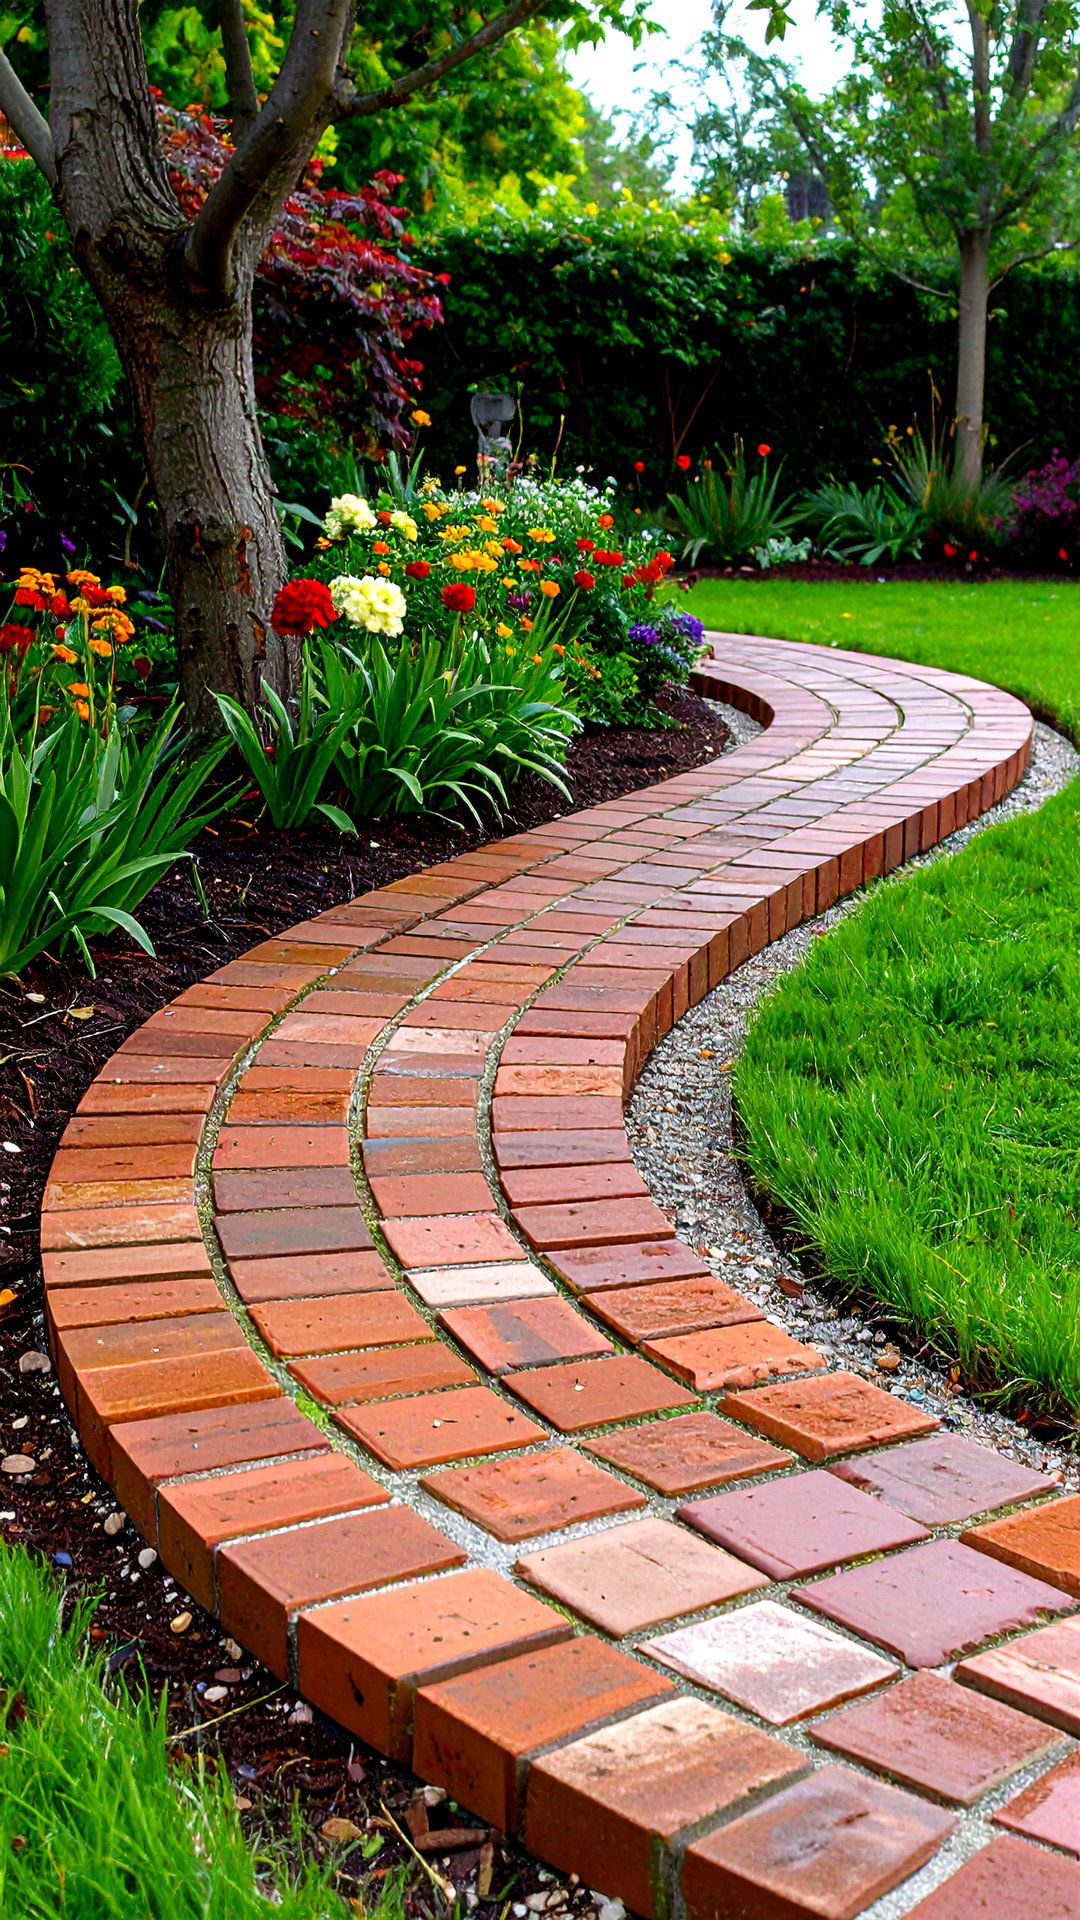
For gardens that feel organic, a sinuous serpentine brick edging line wraps beds in graceful curves. Dig a narrow trench that follows the desired sweep, then lay bricks flat on their broad faces, staggering joints the way you would lay tile. Gently fan the bricks wider on the outside of each bend to keep gaps consistent; inside corners can be tight-fitted or filled with half bricks for a refined finish. A thin layer of masonry sand under and over the course lets you fine-tune alignment before tamping. When turf grows up to the edge, mowing becomes easy and borders stay elegant.
4. Herringbone Brick Edging Accent
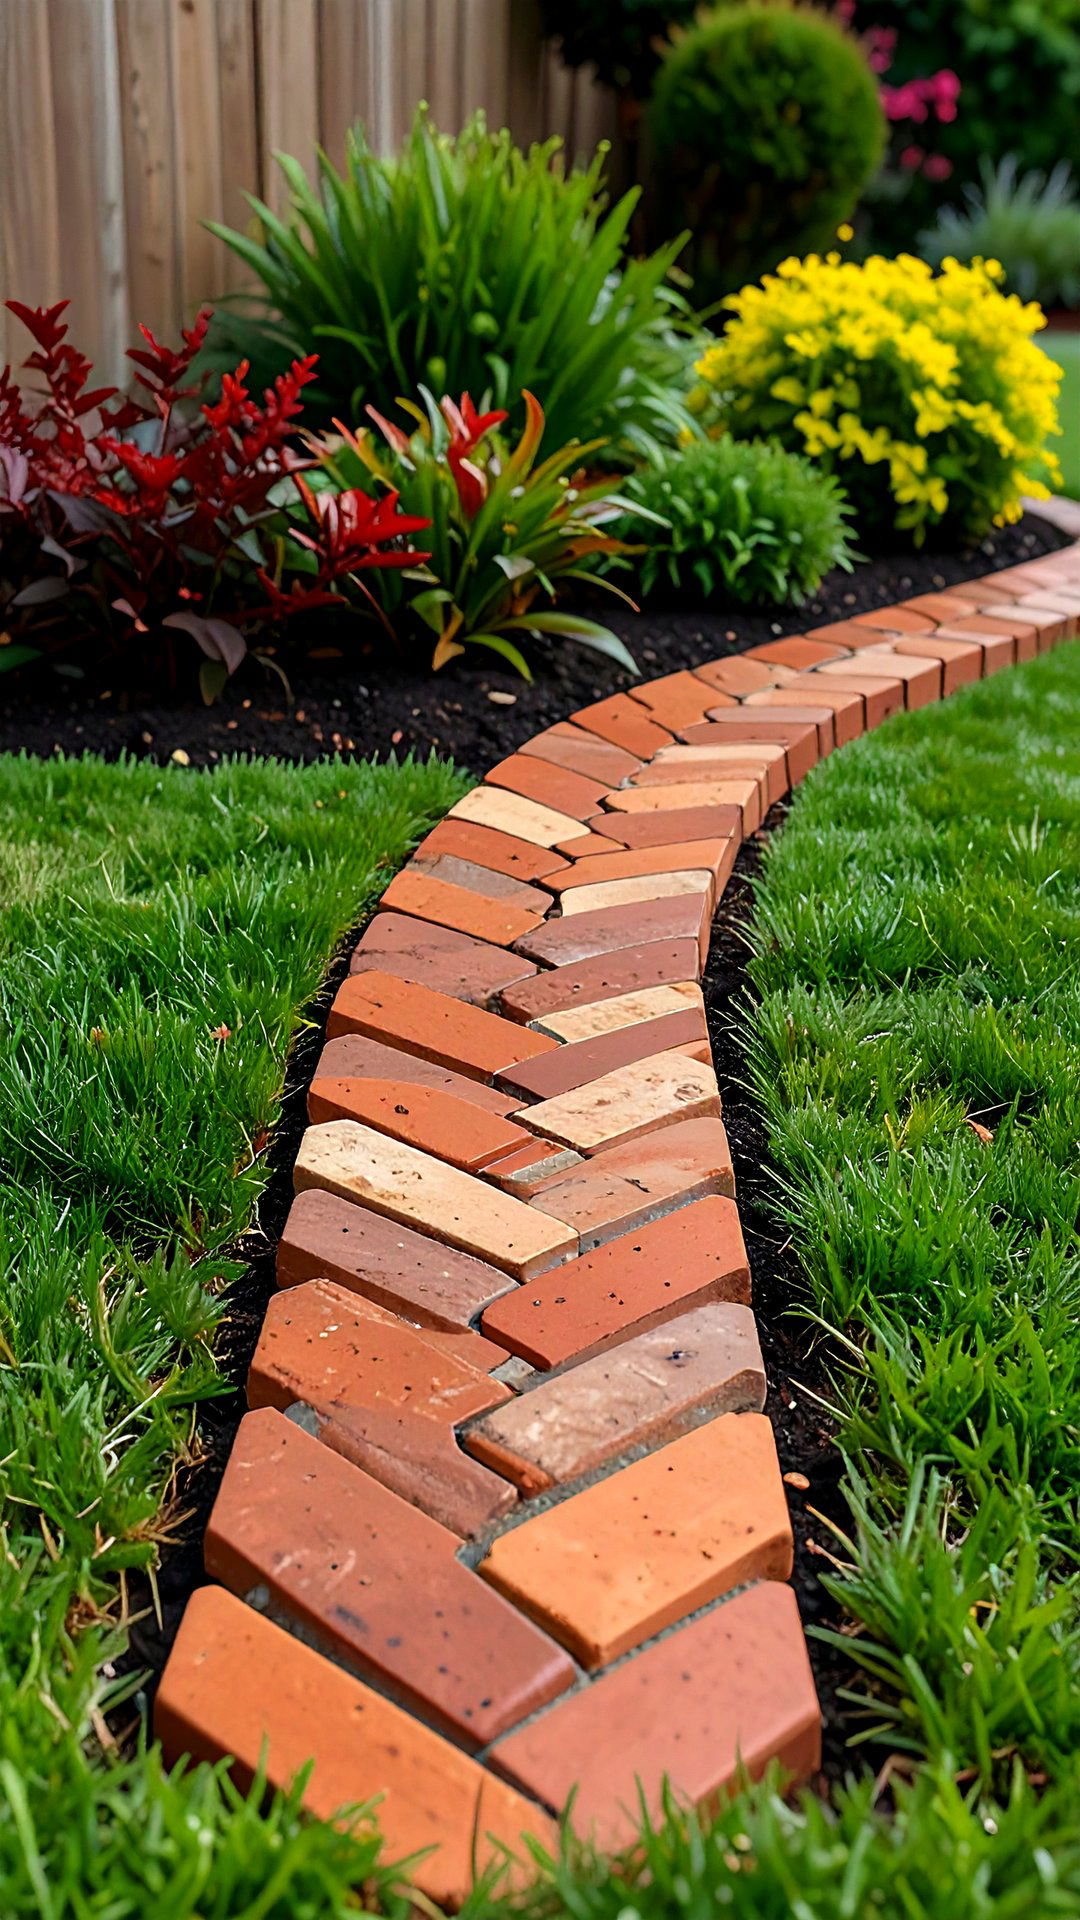
By laying bricks at alternating forty-five – degree angles, herringbone brick edging delivers dynamic energy that instantly elevates a plain lawn border. Begin with a central reference line, then set the first brick perpendicular to it, followed by one angled the opposite way so their ends touch. Continue the V-shaped rhythm until the run is complete. Because this pattern locks units together, it resists shifting on sloped ground. Finish the sides with half bricks or soldier bricks to create straight edges for the mower wheel. A sealer can deepen color and ease cleaning, ensuring the zigzag design stays sharp through every season.
5. Raised Brick Edging Planter Wall
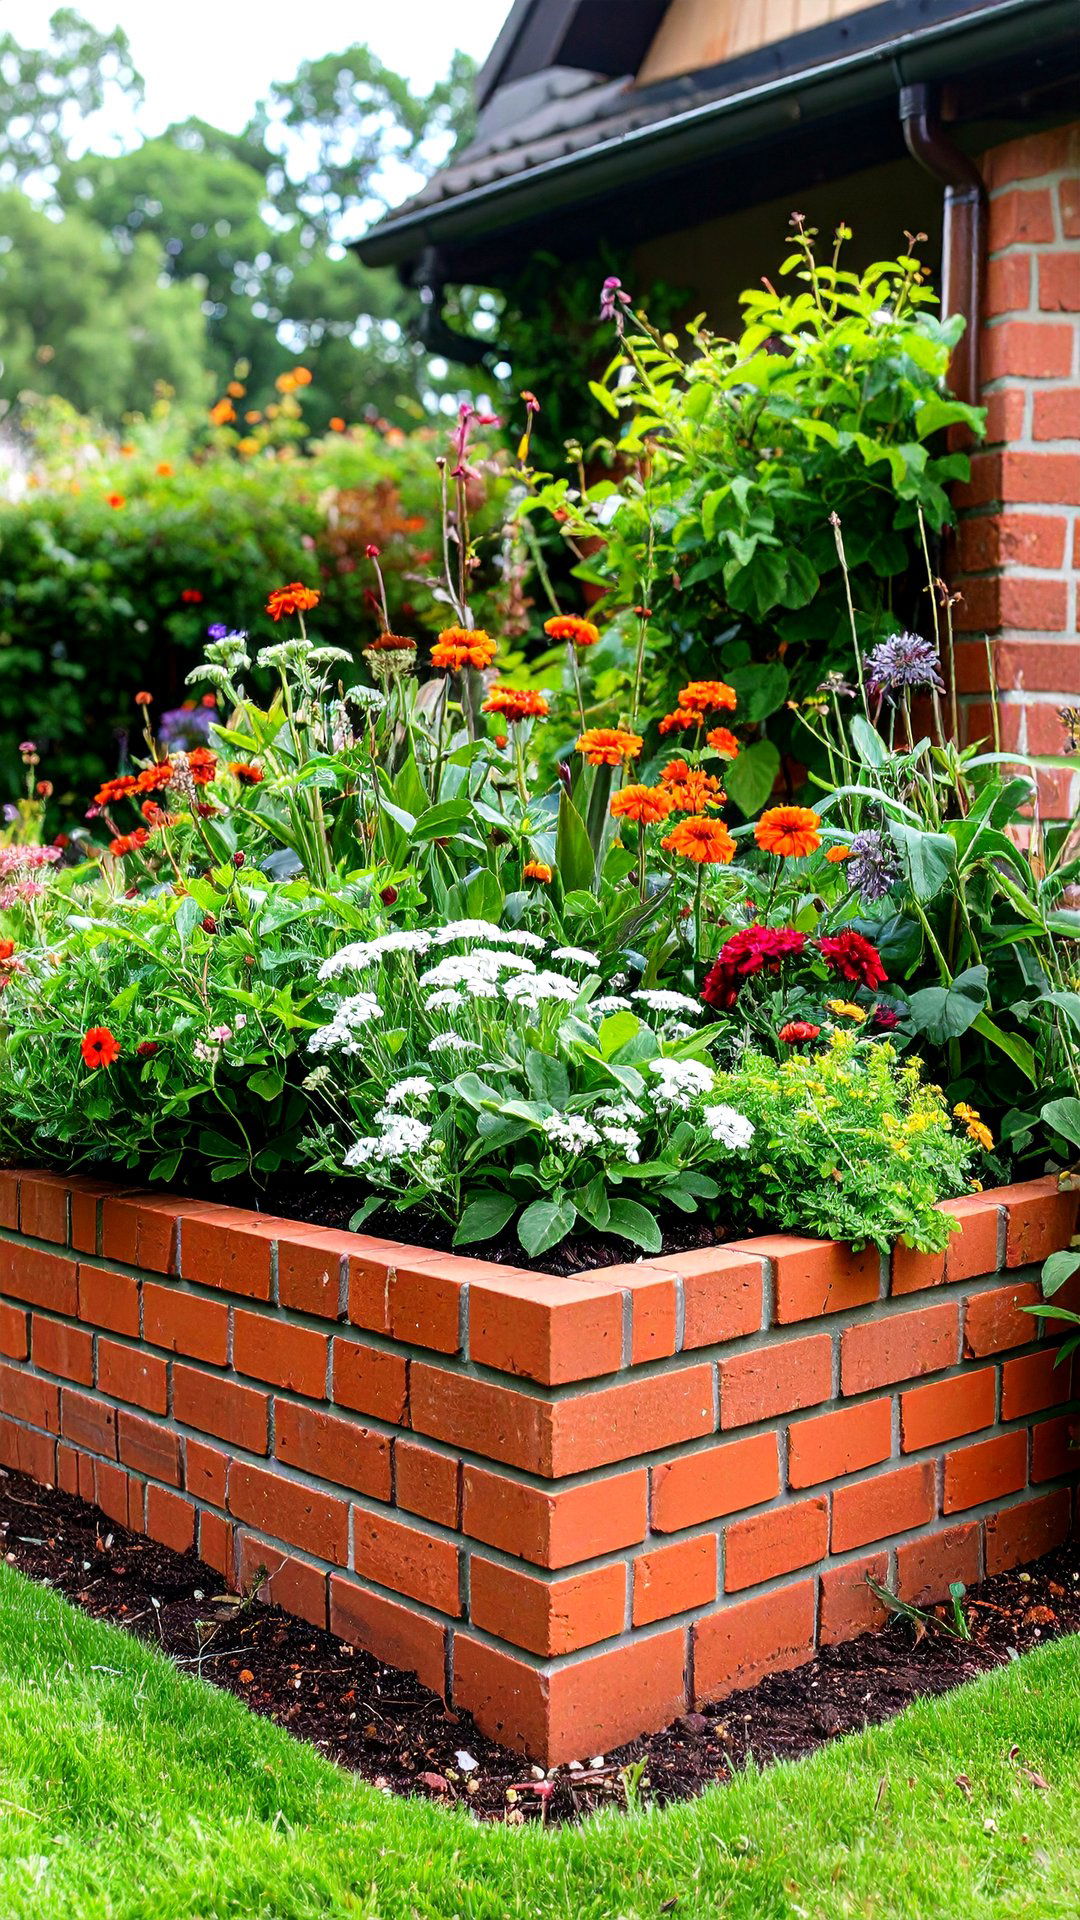
Surprisingly, a raised brick edging planter wall gives your beds both structure and height, letting trailing flowers spill artfully while containing rich soil. Build two or three courses high using landscape adhesive or mortar, stepping the bricks so joints overlap for strength. The low parapet prevents runoff and makes future top-ups of compost easier on your back. Country Living notes that hiring a mason for taller stretches guarantees stability and clean lines, but most DIYers can handle borders under eighteen inches with patience and a level. Add a concealed drainpipe behind the wall to relieve water pressure after heavy rain.
6. Reclaimed Brick Edging for Rustic Charm
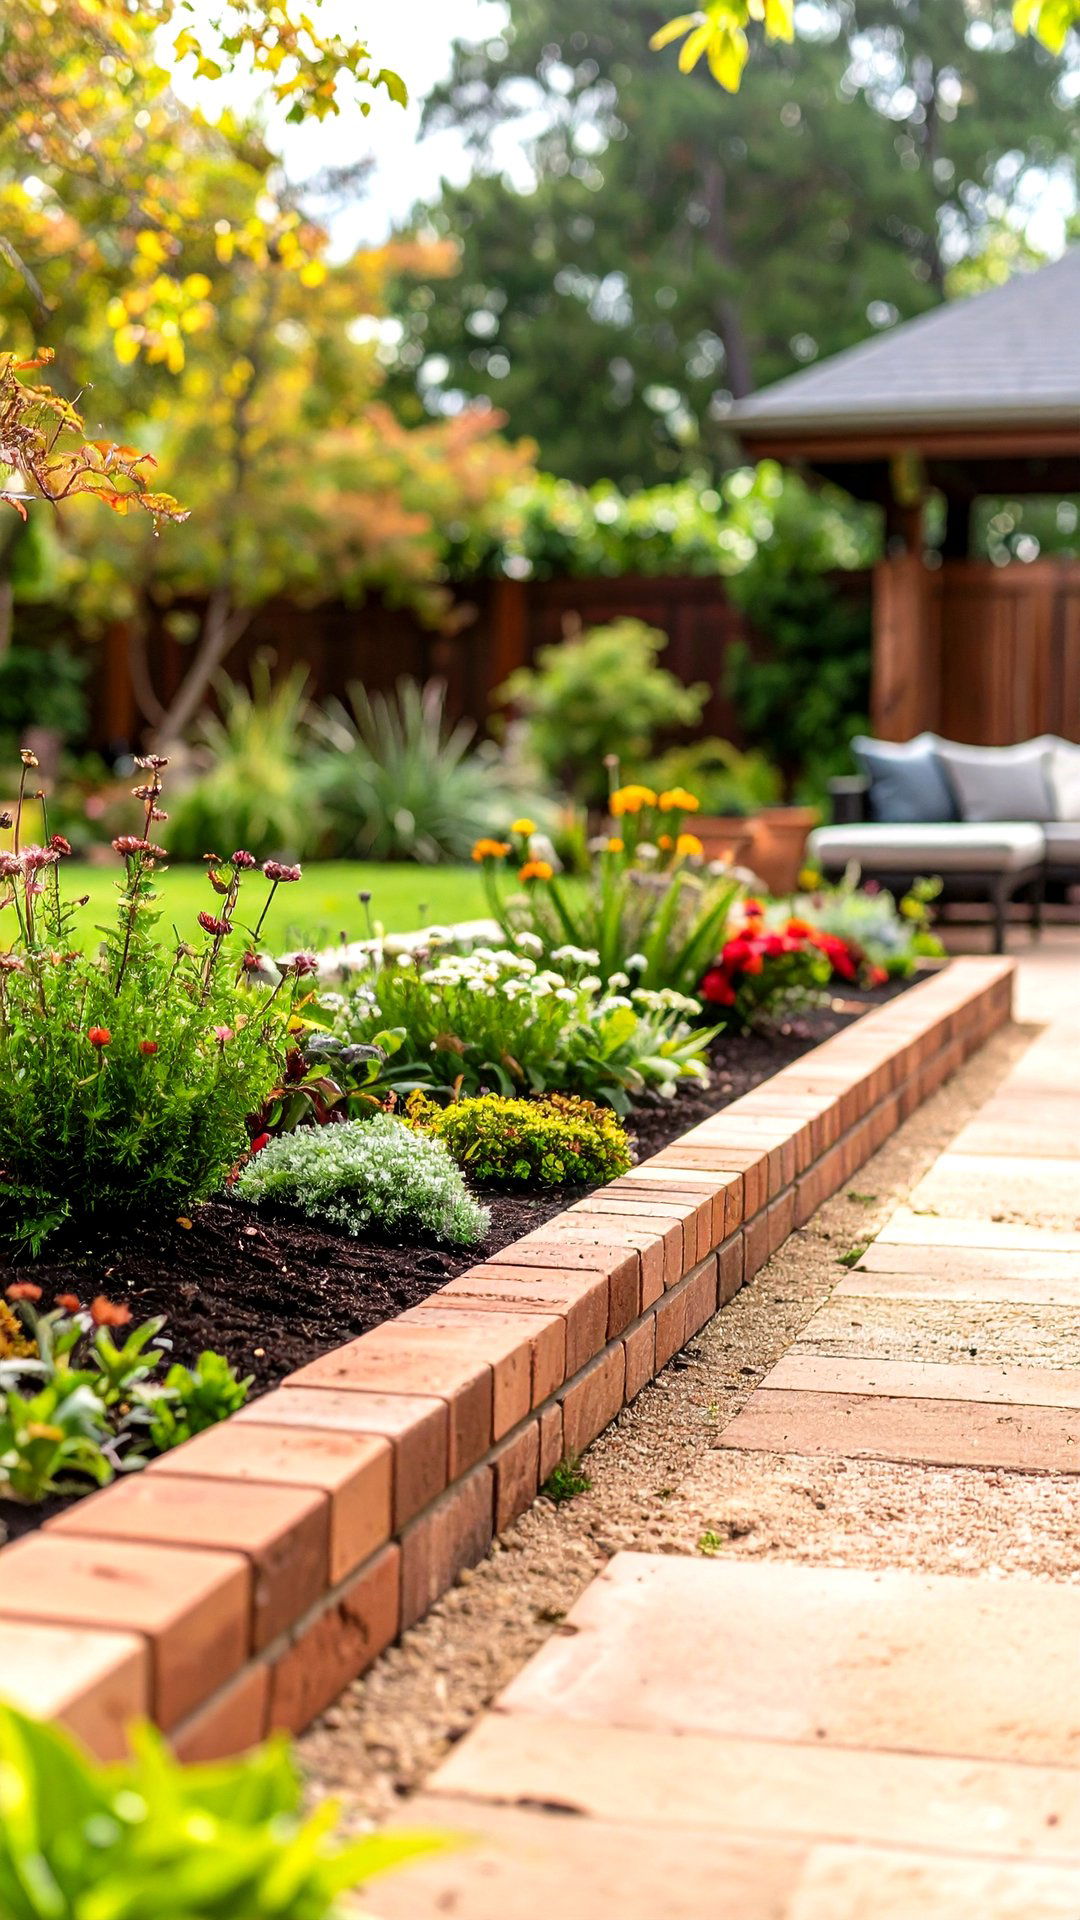
Looking for instant history? Reclaimed brick edging adds the soft patina that new units can’t fake. Hunt demolition yards or online exchanges for sand-stock or handmade bricks whose weathered faces bring depth to planting schemes. Before use, scrub off loose mortar and sort by tone so you can blend colors naturally along the run. Because old bricks vary slightly in size, dry-lay the course first, adjusting gaps with play sand until the fit feels relaxed rather than forced. The Brick Pit’s 2025 guide reminds DIYers that choosing salvaged materials keeps masonry out of landfill while saving money and lowering carbon.
7. Mortarless Brick Edging Quick DIY
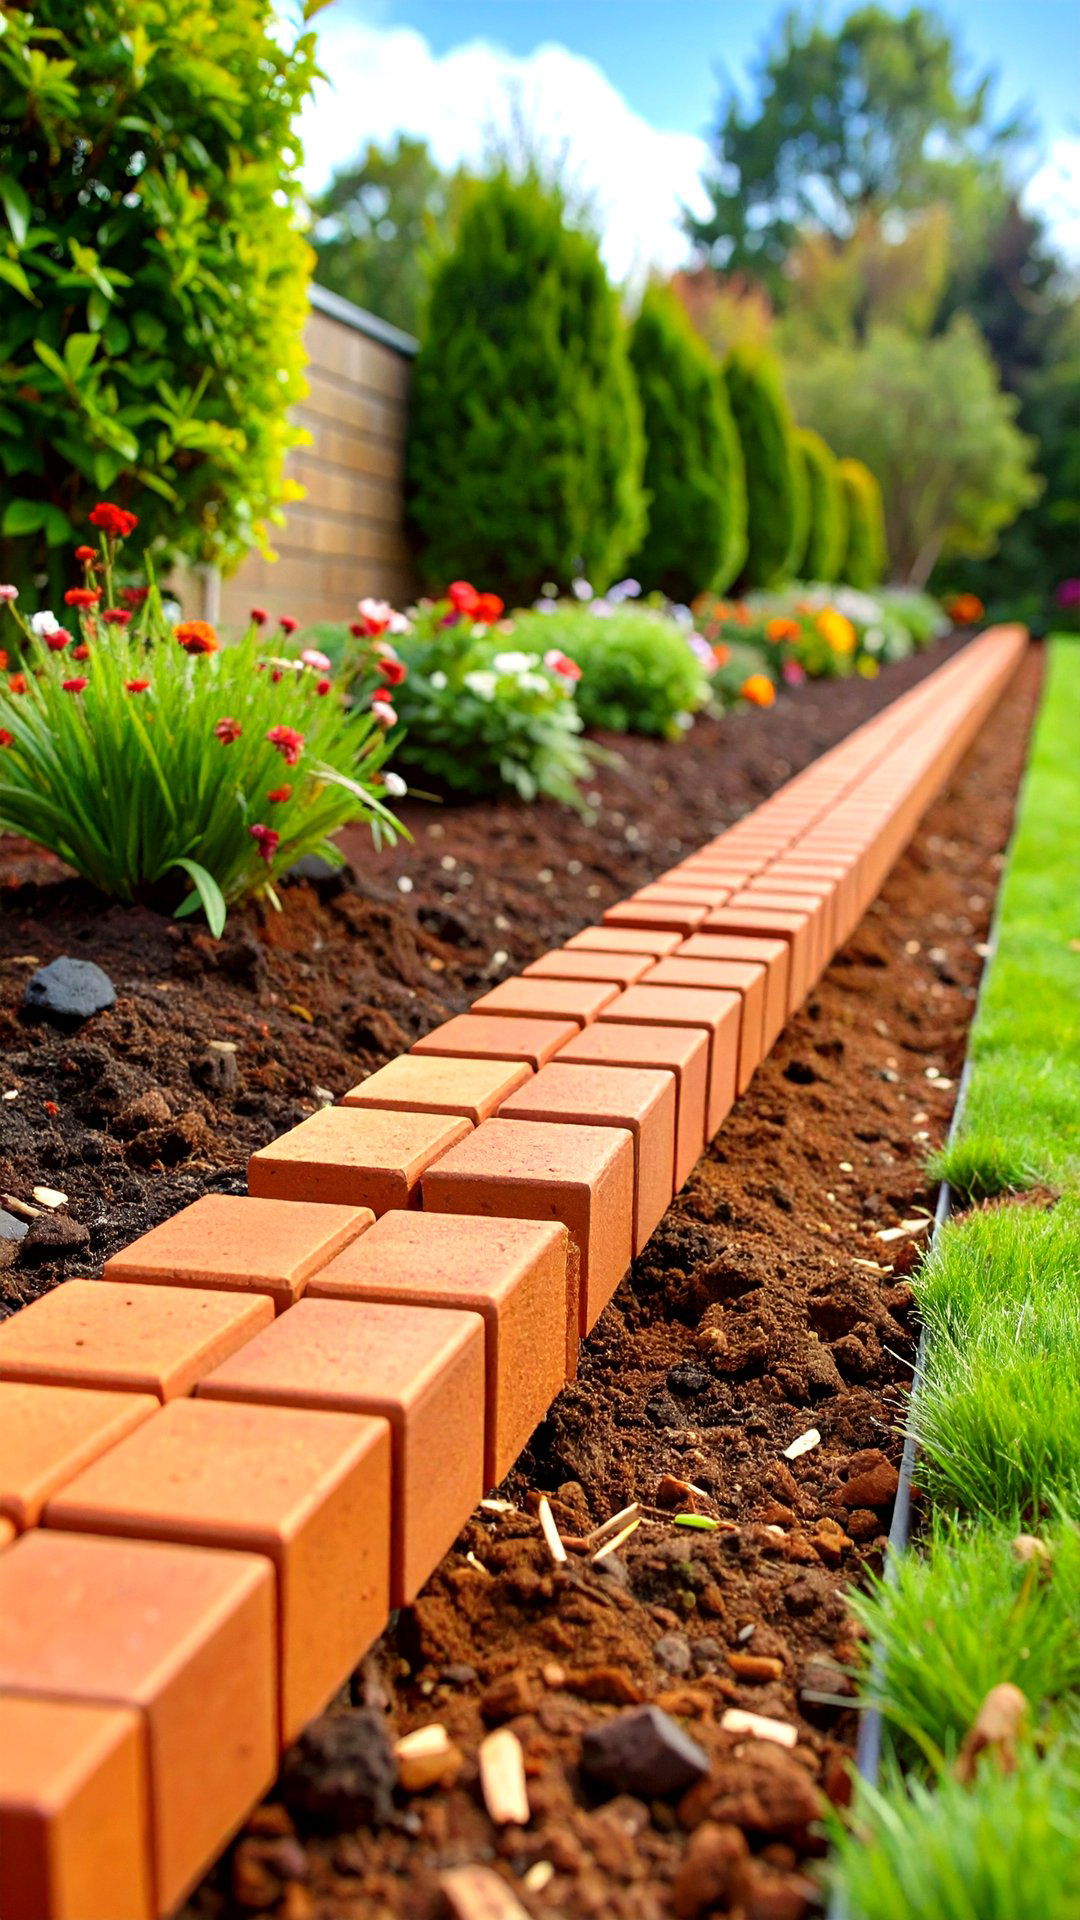
To finish a weekend landscape refresh, mortarless brick edging delivers speed without sacrificing durability. Choose interlocking concrete bricks or standard clay units and run a hidden bead of exterior-grade construction adhesive under each to deter shifting. Because you work course by course instead of mixing mortar, there’s no cleanup mess or racing against setting times — perfect for beginners. Keep the trench depth uniform, compact the base firmly, and install plastic landscape spikes at intervals behind the row for extra security. With nothing to cure, you can immediately backfill, water in plants, and enjoy crisp brick lines before Monday morning.
8. Painted Brick Edging Color Pop
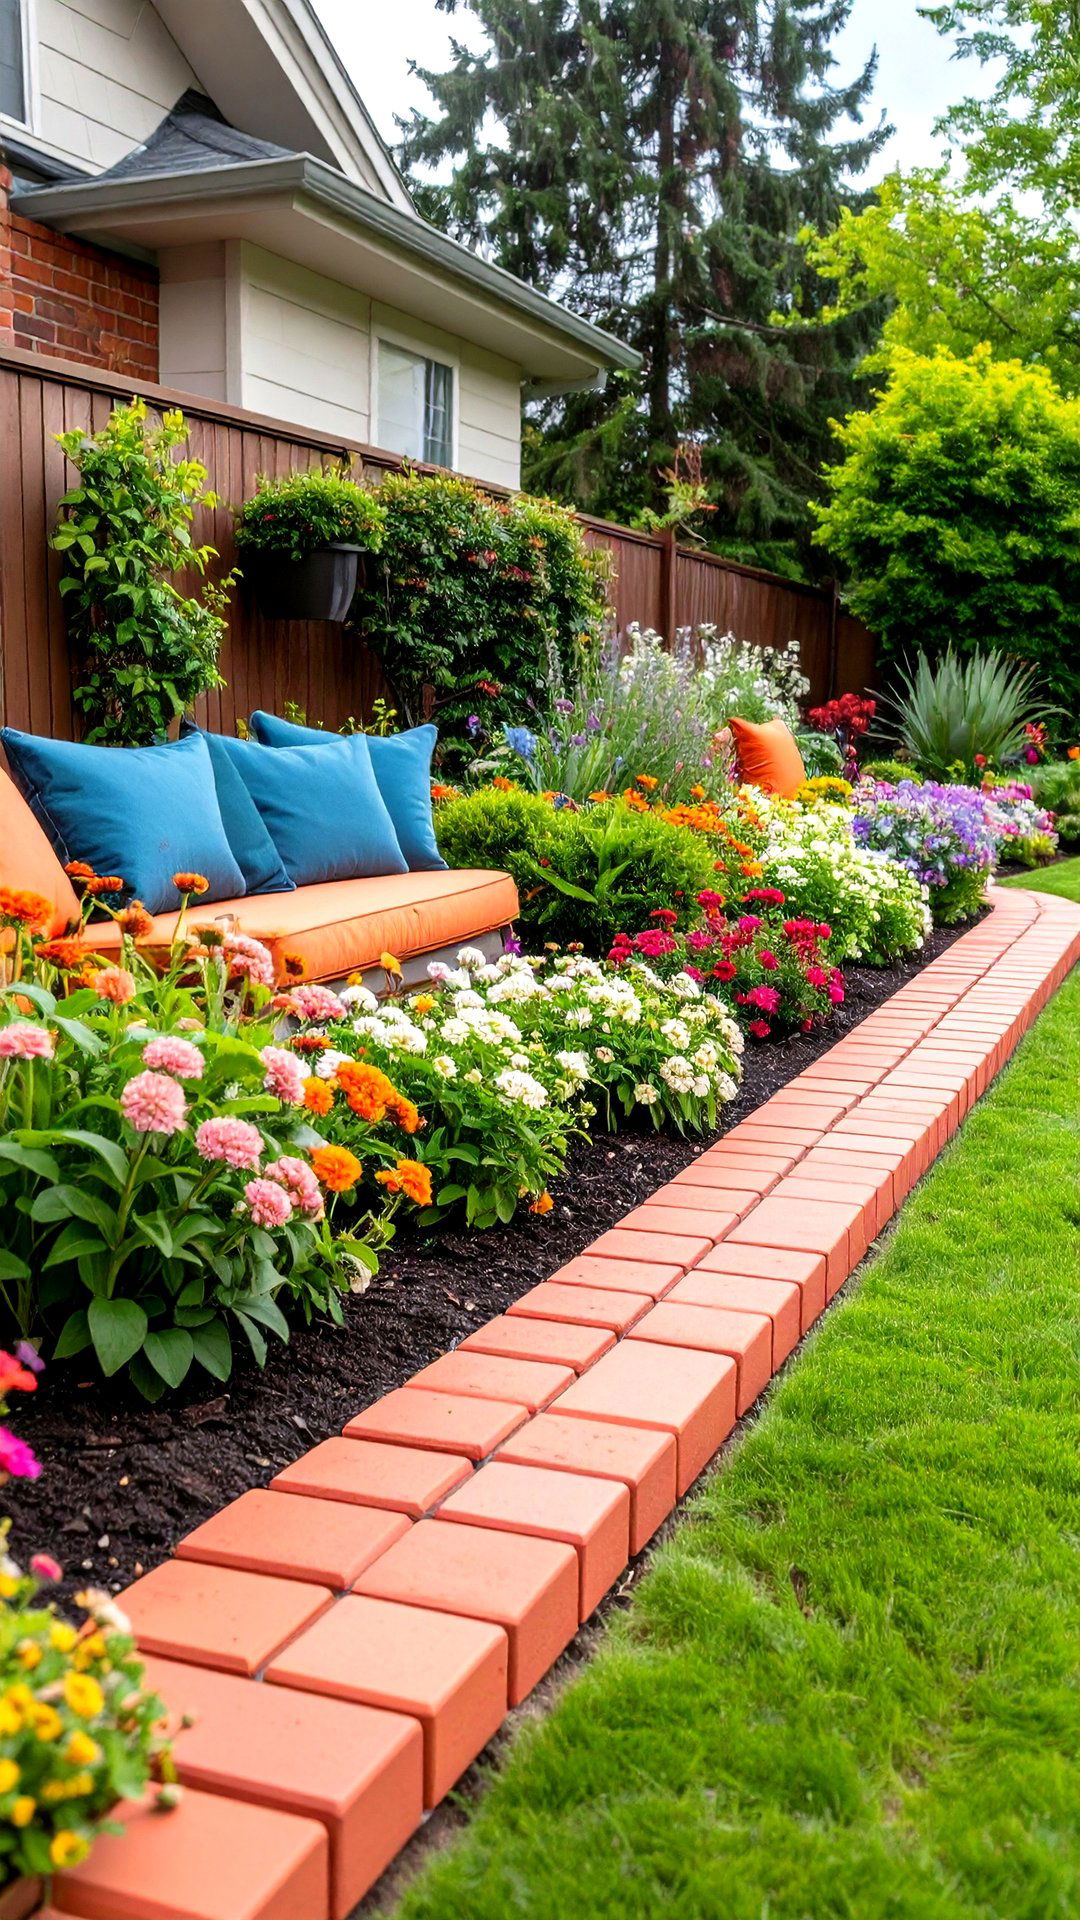
Consider giving brick edging a playful twist by coating select bricks with masonry paint in a hue that echoes nearby blooms. Clean and dry the surface thoroughly, prime once, then apply two thin coats for weather resistance. Limiting painted bricks to spaced intervals — or perhaps one band in every five — strikes a balance between accent and overload. Because the color sits above grade, touch-ups are simple; plan to refresh every couple of seasons. Coordinating paint with front-door hardware or patio cushions subtly ties the landscape to the house, proving brick edging can be both hardworking and expressive.
9. Brick-and-Gravel Edging Drainage Strip
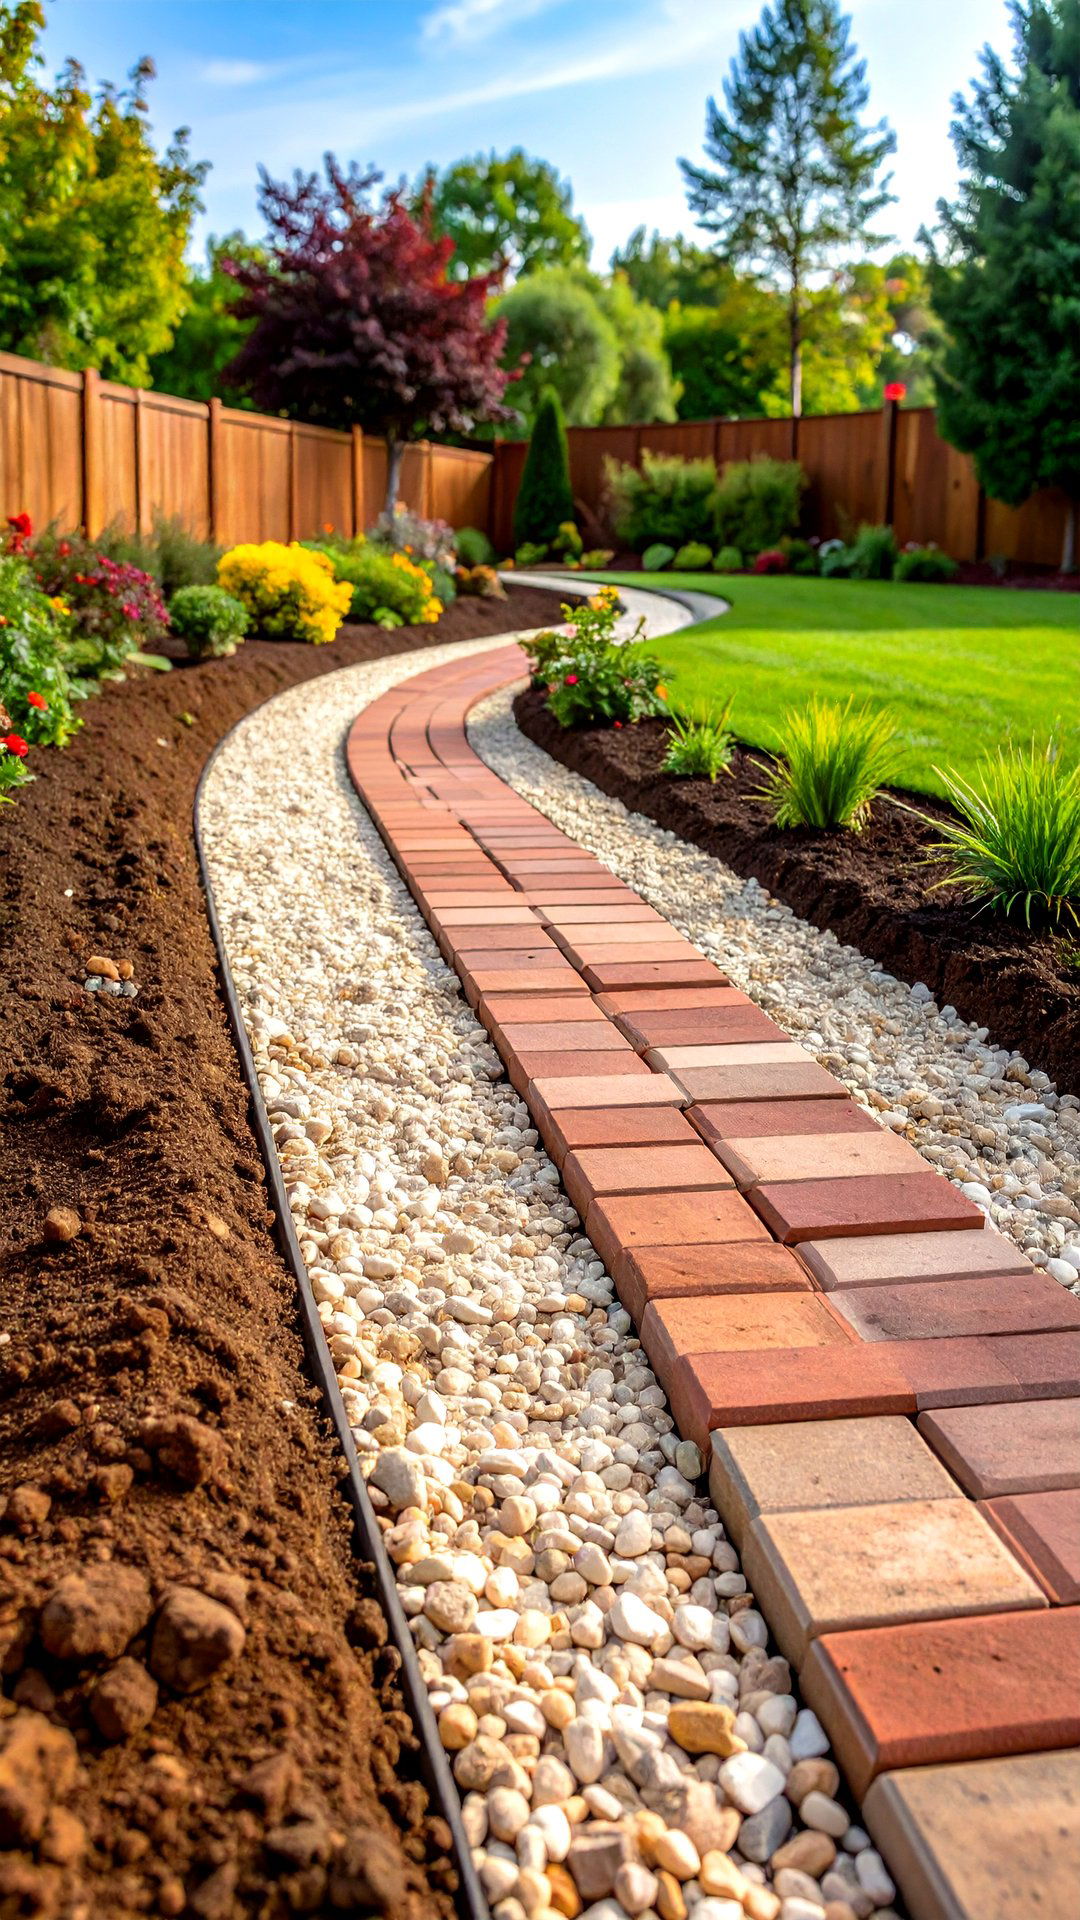
As clay soil refuses to drain, a brick-and-gravel edging strip solves two problems at once — definition and water management. Lay the bricks in a single flat course bordering the bed, then excavate a six-inch trench directly outside that line and fill it with washed gravel. Rainwater filters through quickly, keeping plant roots drier and pathways mud-free. The Spruce highlights how the contrasting textures also add eye-catching detail to lush planting schemes, proving practical choices can be beautiful. Finish by tamping the gravel level with brick tops so mower wheels glide across without spraying stones.
10. Permeable Brick Edging for Runoff
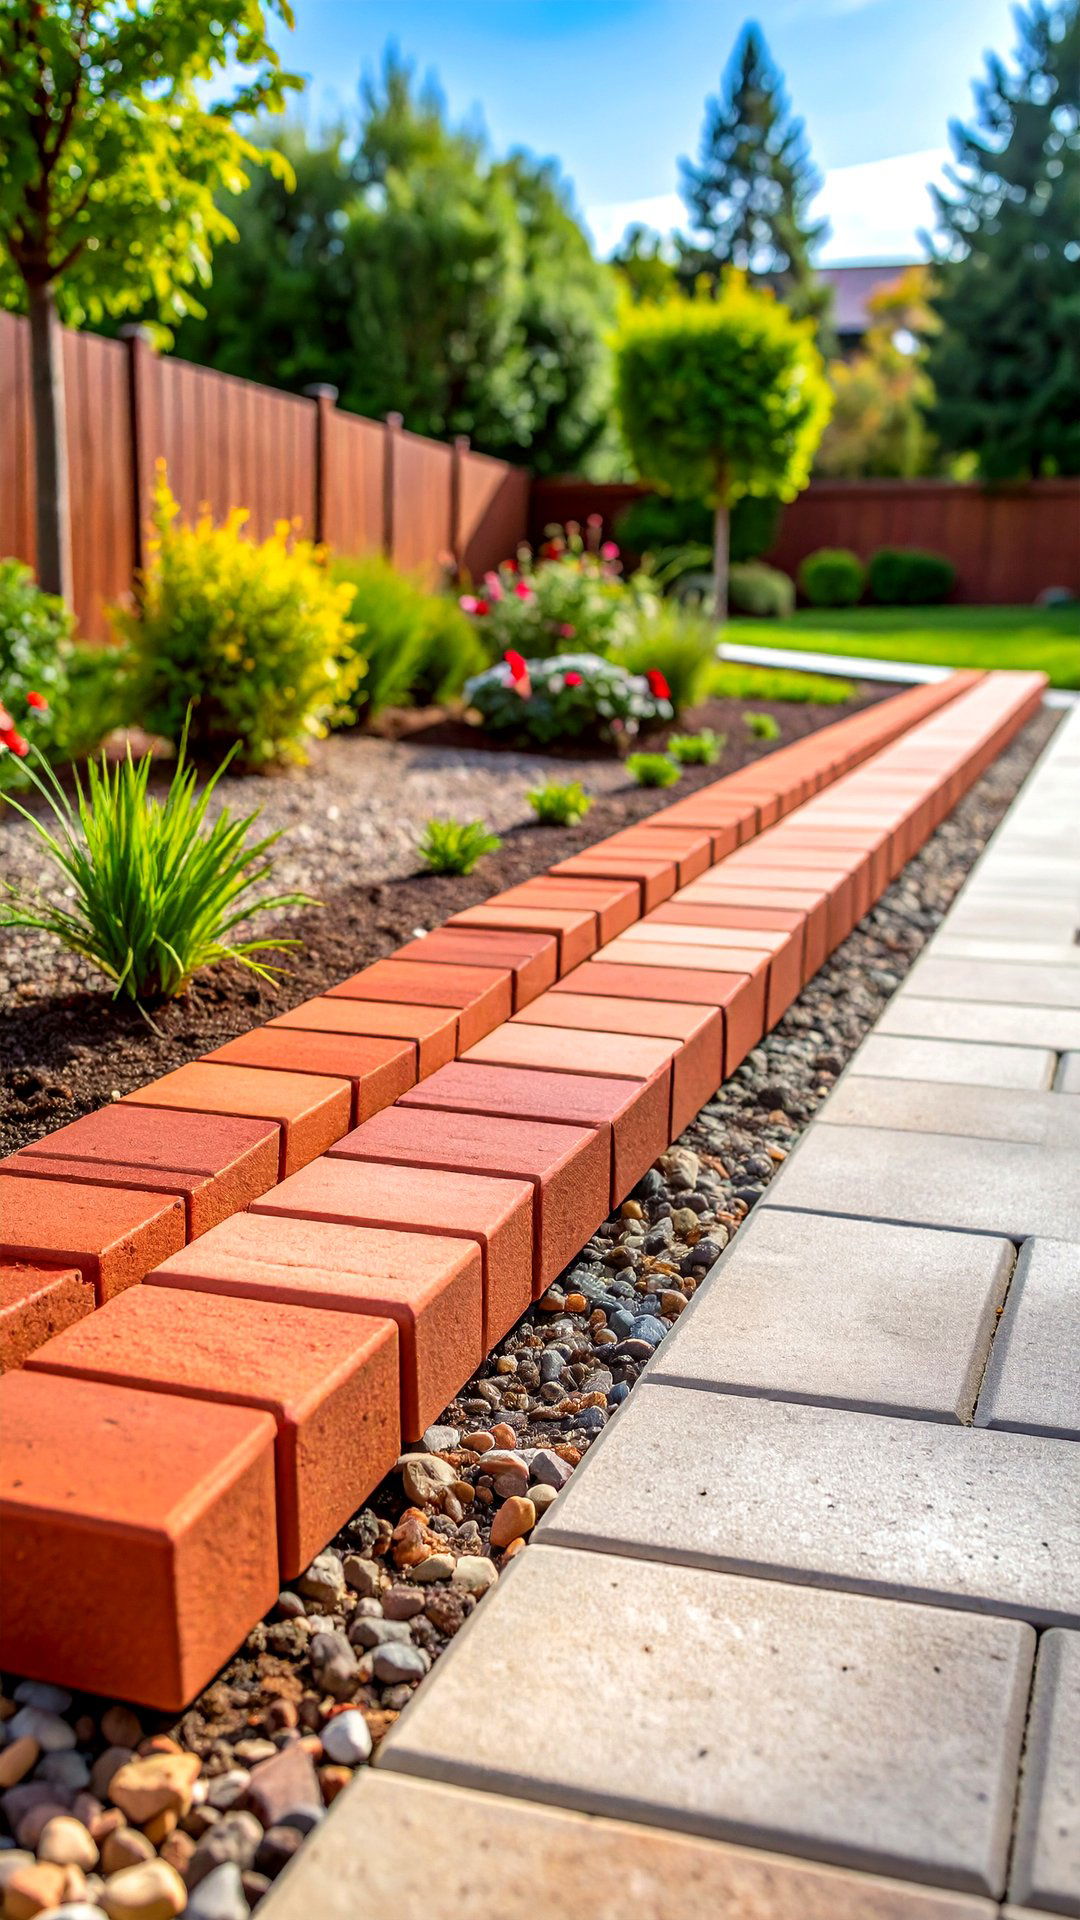
Owing to tighter storm-water regulations, permeable brick edging has gained popularity with eco-minded renovators. Instead of solid mortar joints, bricks are spaced slightly apart over a sub-base of angular gravel that lets water seep straight into the ground. Invisible Structures’ 2025 overview reports drainage rates of more than thirty-eight inches an hour when permeable systems are installed correctly, virtually eliminating puddles along hardscapes. To retrofit an existing edge, lift every second brick, replace the soil beneath with clean gravel, and re-lay the units on edge restraints. Finish with polymeric joint sand formulated for permeability so the benefits last.
11. Solar-Lit Brick Edging Path
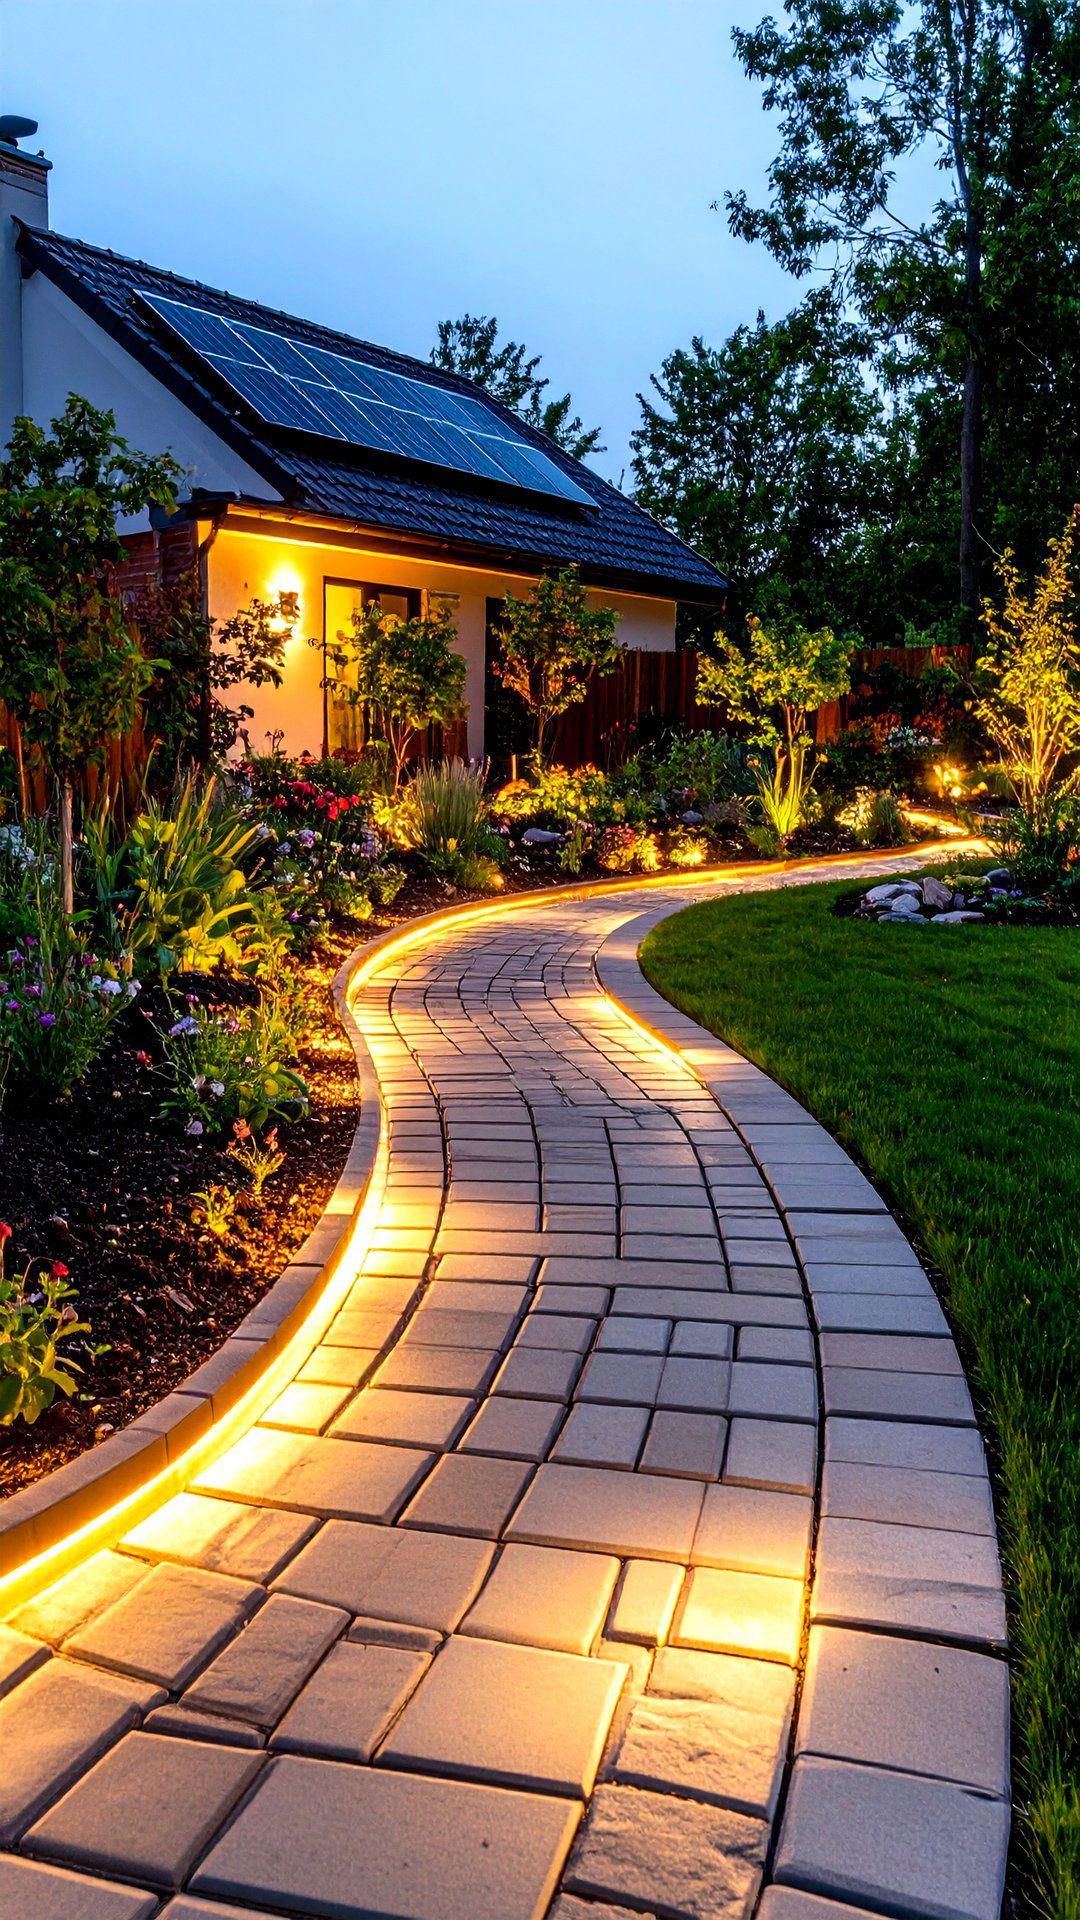
Take nighttime ambiance up a notch by choosing solar-lit brick edging kits that snap together in minutes. Each section contains standard-looking bricks interspersed with rechargeable light modules, eliminating the need for separate path lights and messy cables. Argee’s 20-foot kit, for instance, arrives with unlit and illuminated pieces that curve or run straight around beds, adding both safety and drama after sunset. Installation is simple: join the bricks, press the attached spikes into the soil, and let the sun power up the LEDs. Replacing a battery later involves lifting just one lighted brick — no rewiring required.
12. Zigzag Brick Edging Sawtooth Look
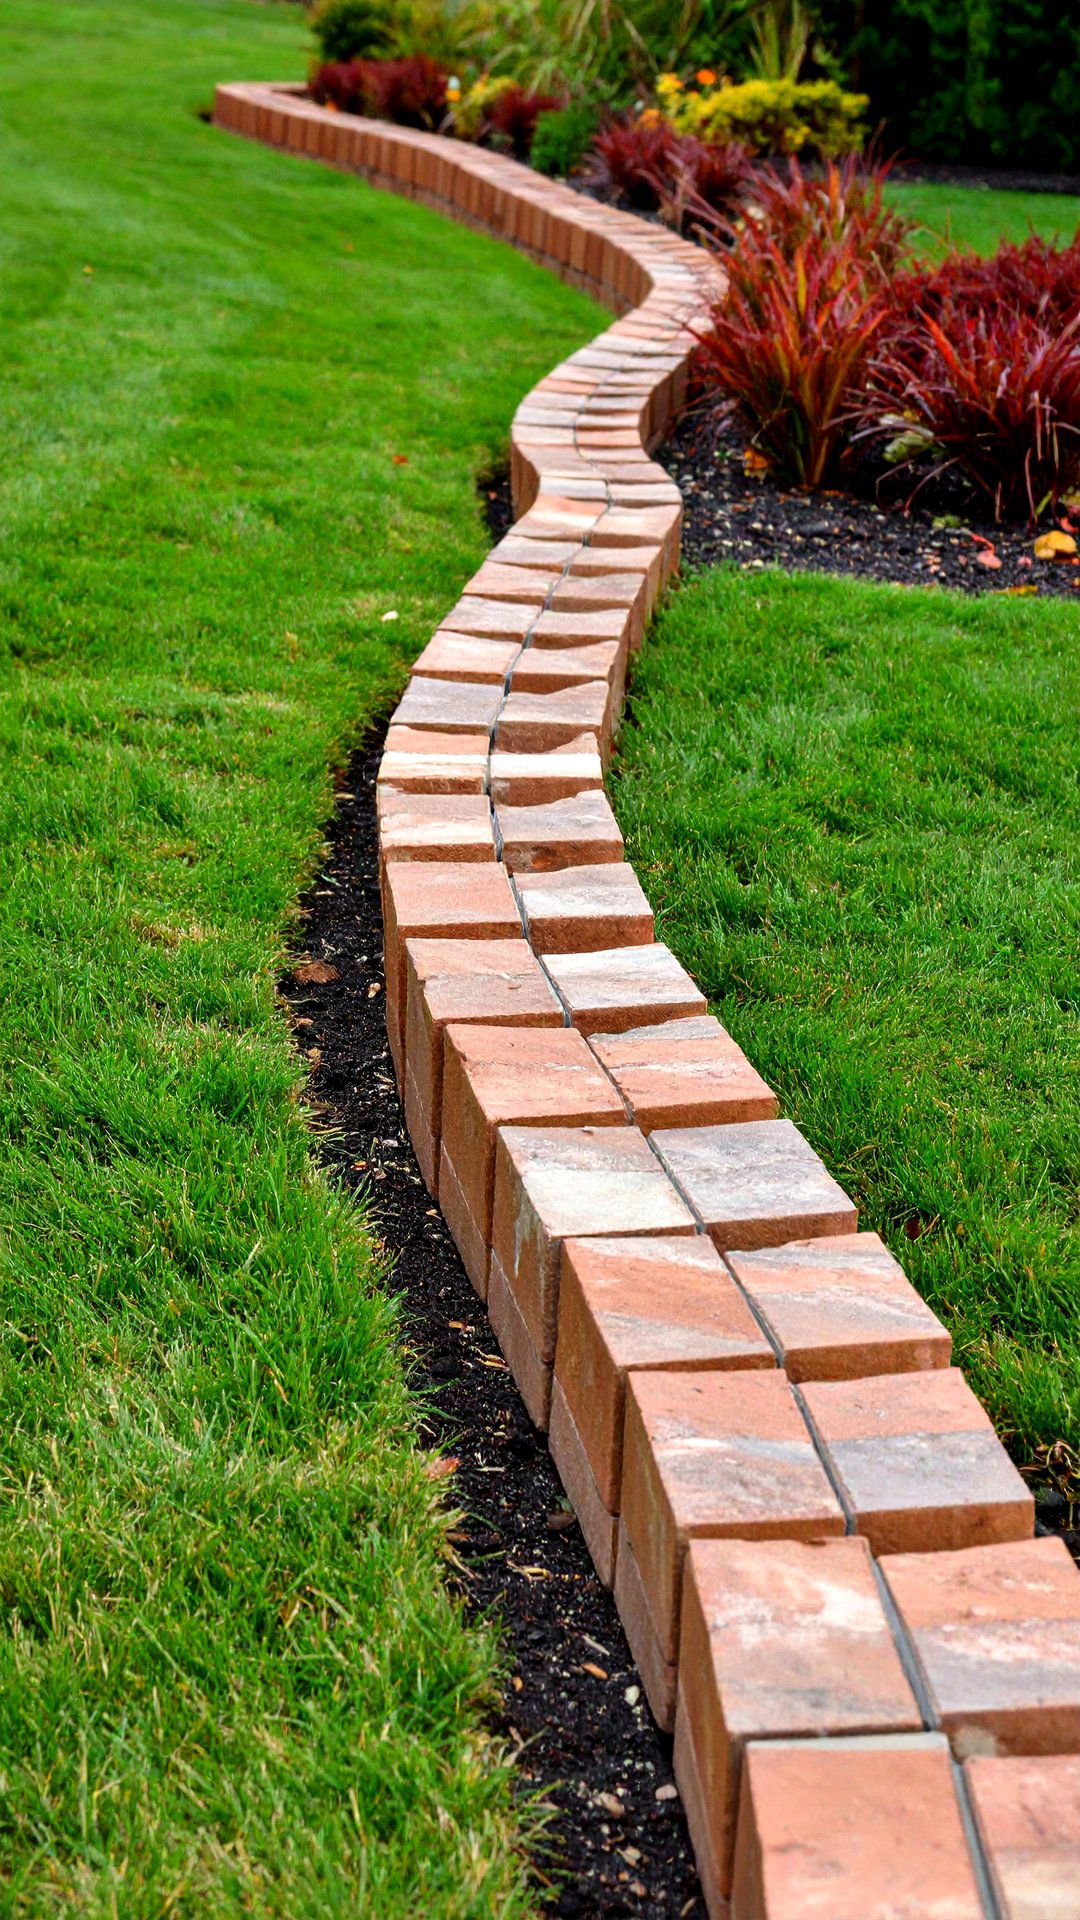
Certainly, a zigzag or sawtooth brick edging can inject edgy personality into otherwise formal plantings. Stand bricks on end but tilt each alternately left and right so only the top corner shows, creating sharp tooth-like peaks. The angled faces catch morning light and cast playful shadows across the border. Because the bricks interlock against each other, the pattern is surprisingly stable; just bury a third of each unit for a solid bite. Try setting the points at a consistent 60-degree angle to make mowing along the edge simple. In small spaces, the rhythmic geometry feels almost sculptural.
13. Brick Edging Tree Ring
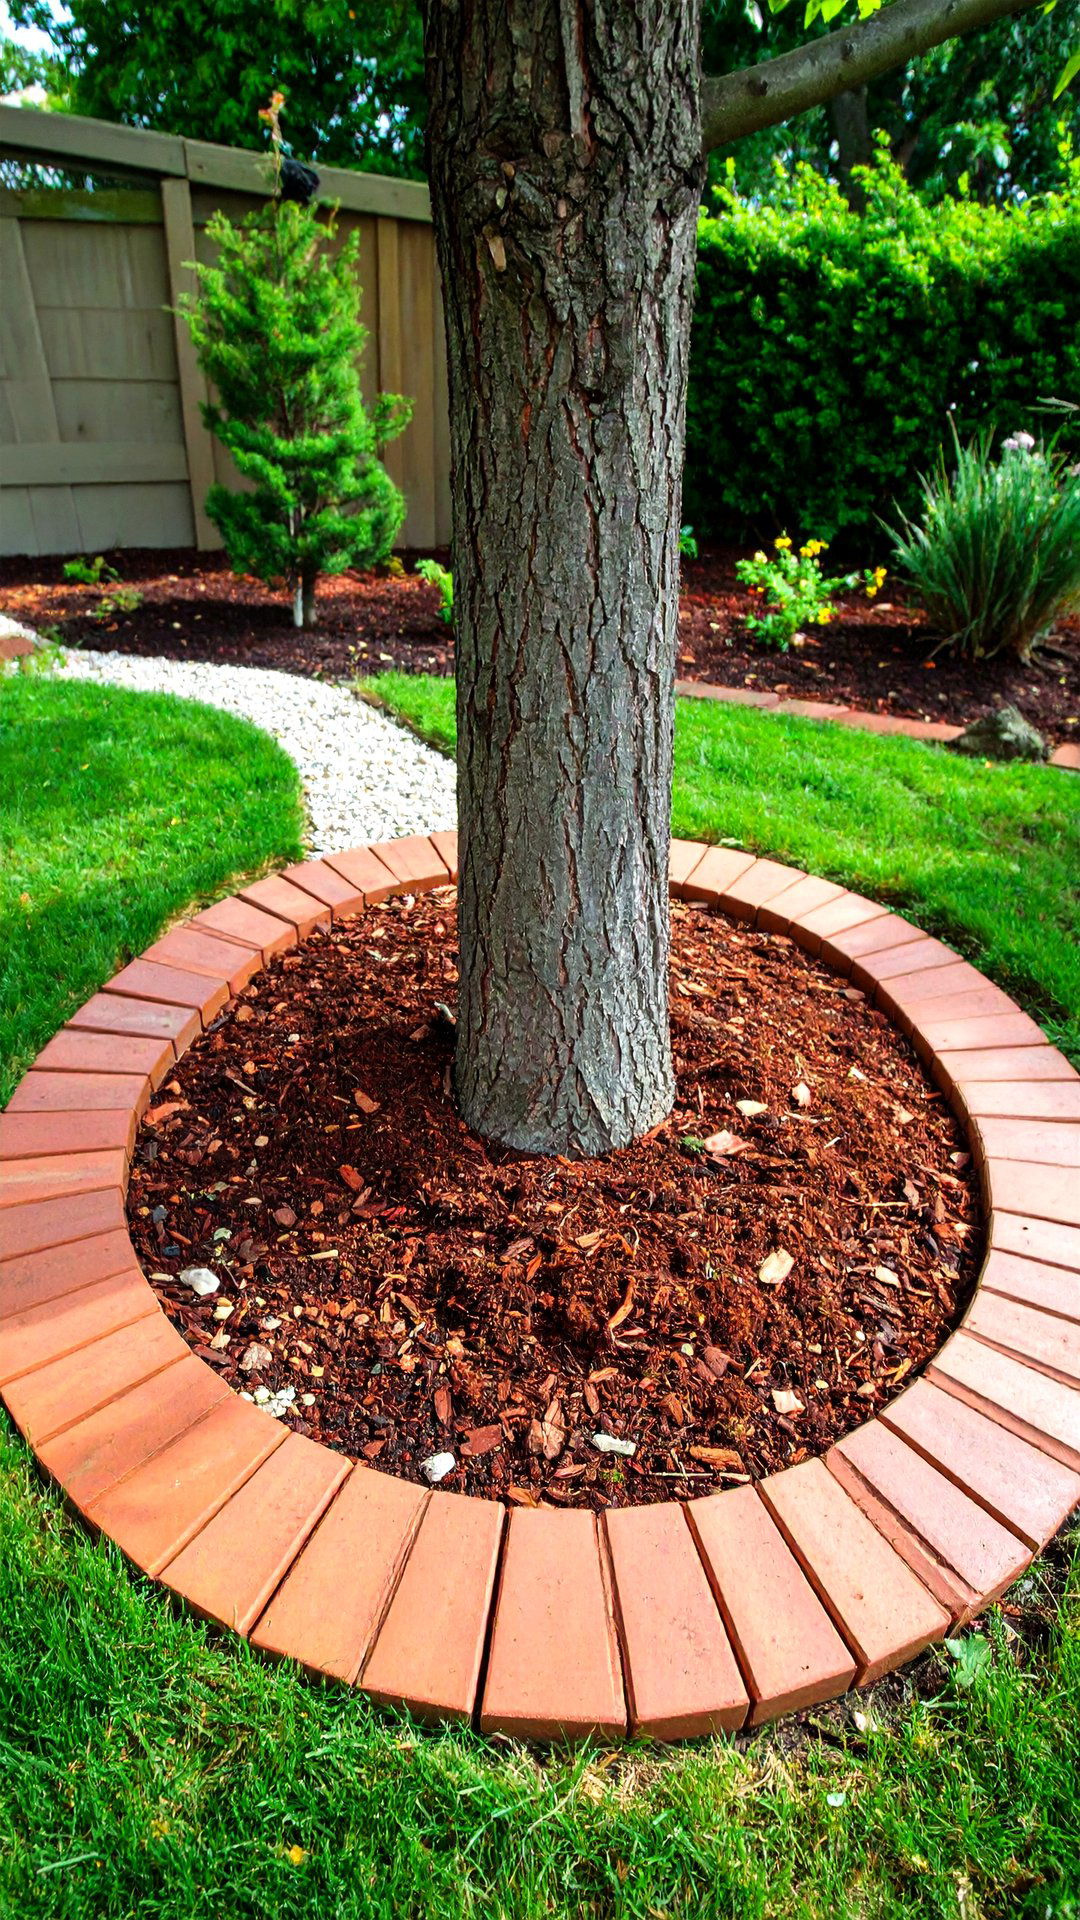
When mature trees claim center stage, a ring of brick edging offers both protection and polish. Mark a circle at least eighteen inches beyond the trunk, then dig a channel wide enough for bricks laid flat. Use flexible edging material as a temporary guide to keep the curve uniform, or trace with garden hose. The bricks create a mowing strip that prevents bark damage from trimmers while tidying dropped mulch. Fill the interior with compost or decorative gravel, adjusting grade so water moves away from the trunk flare. Seasonal bulb layers inside the ring create effortless color under the canopy.
14. Flush-Set Modern Brick Edging
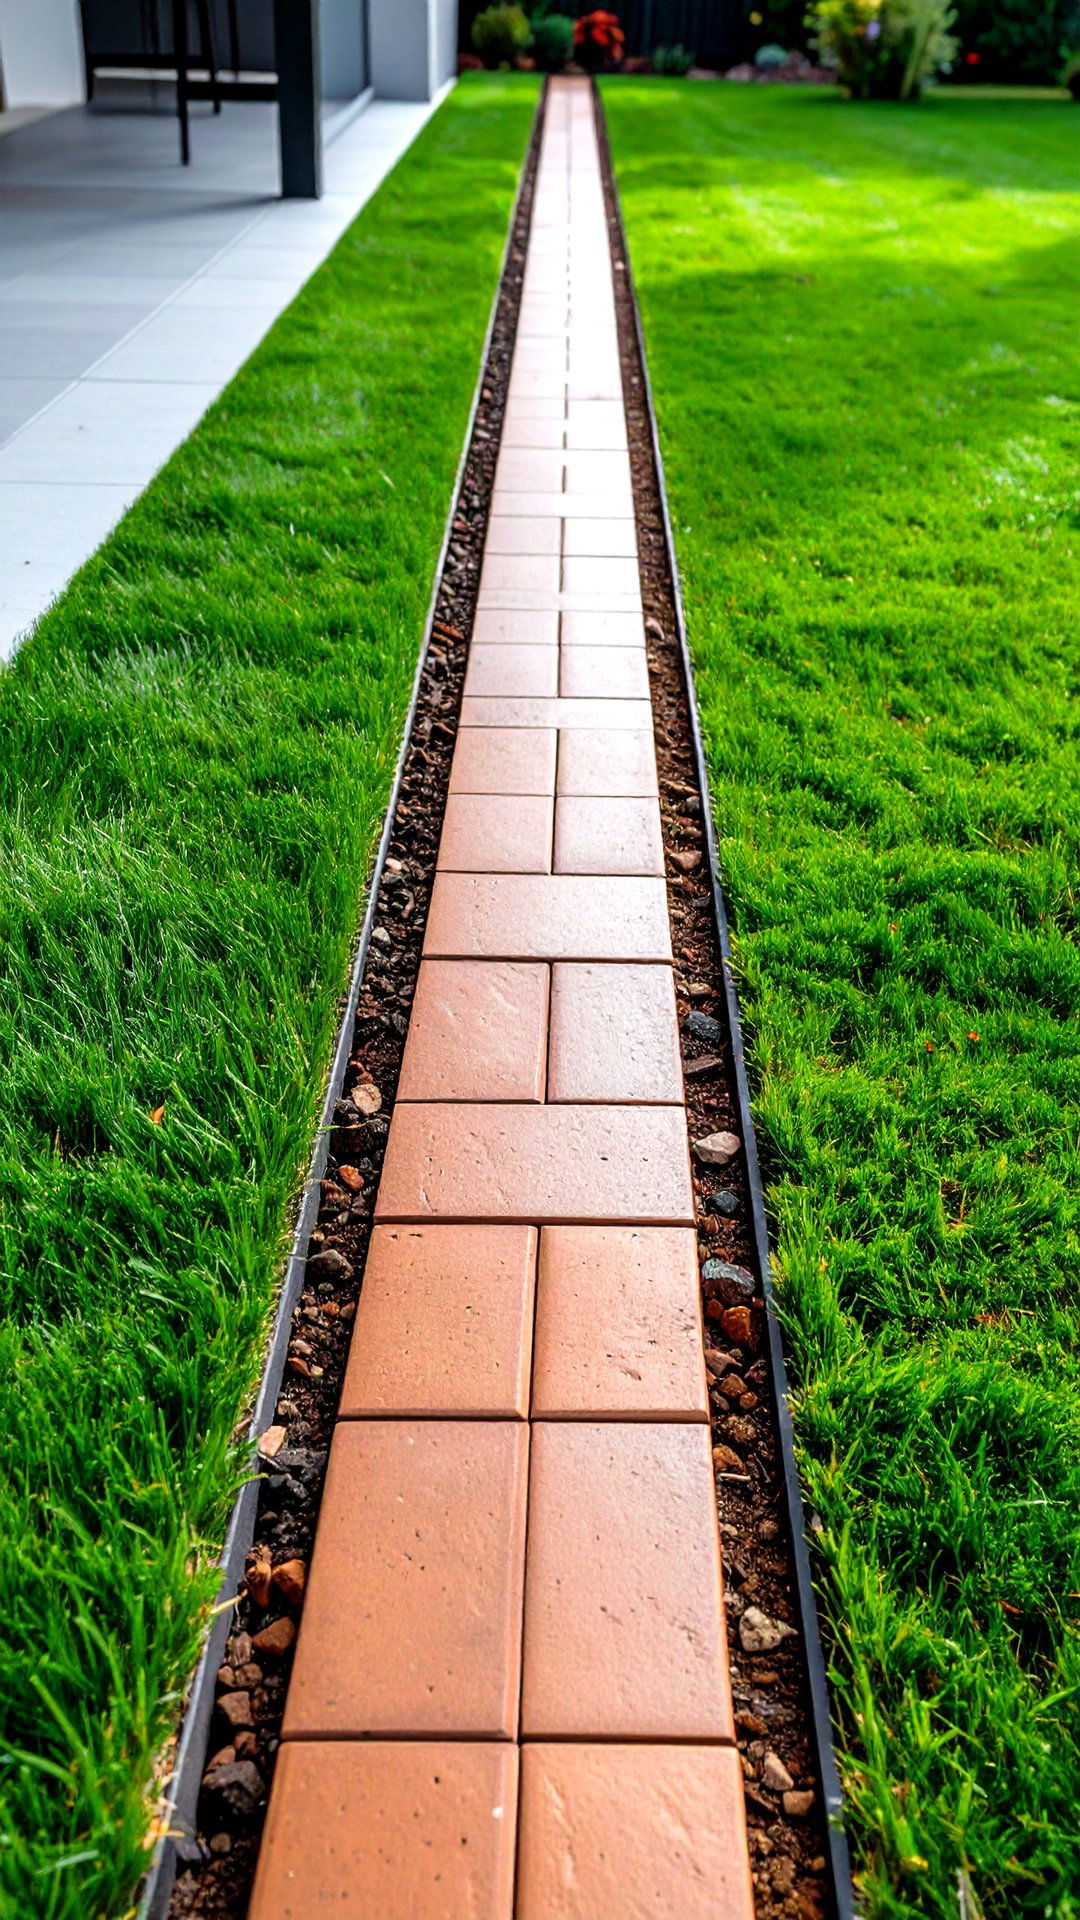
By sinking bricks level with the surrounding turf, flush-set brick edging achieves a sleek, contemporary look that vanishes underfoot. Start by cutting a slot in the sod the exact thickness of a brick, then insert each unit so its top sits perfectly flush with grass blades. Because no vertical surface remains, lawnmower wheels can ride directly over the edge, eliminating weekly strimming. Pick bricks that match patio pavers to extend the line visually through the yard, or contrast deliberately with darker tone for subtle framing. An occasional top dressing of sand keeps joints tight and discourages weeds.
15. Brick Mosaic Edging Artful Detail
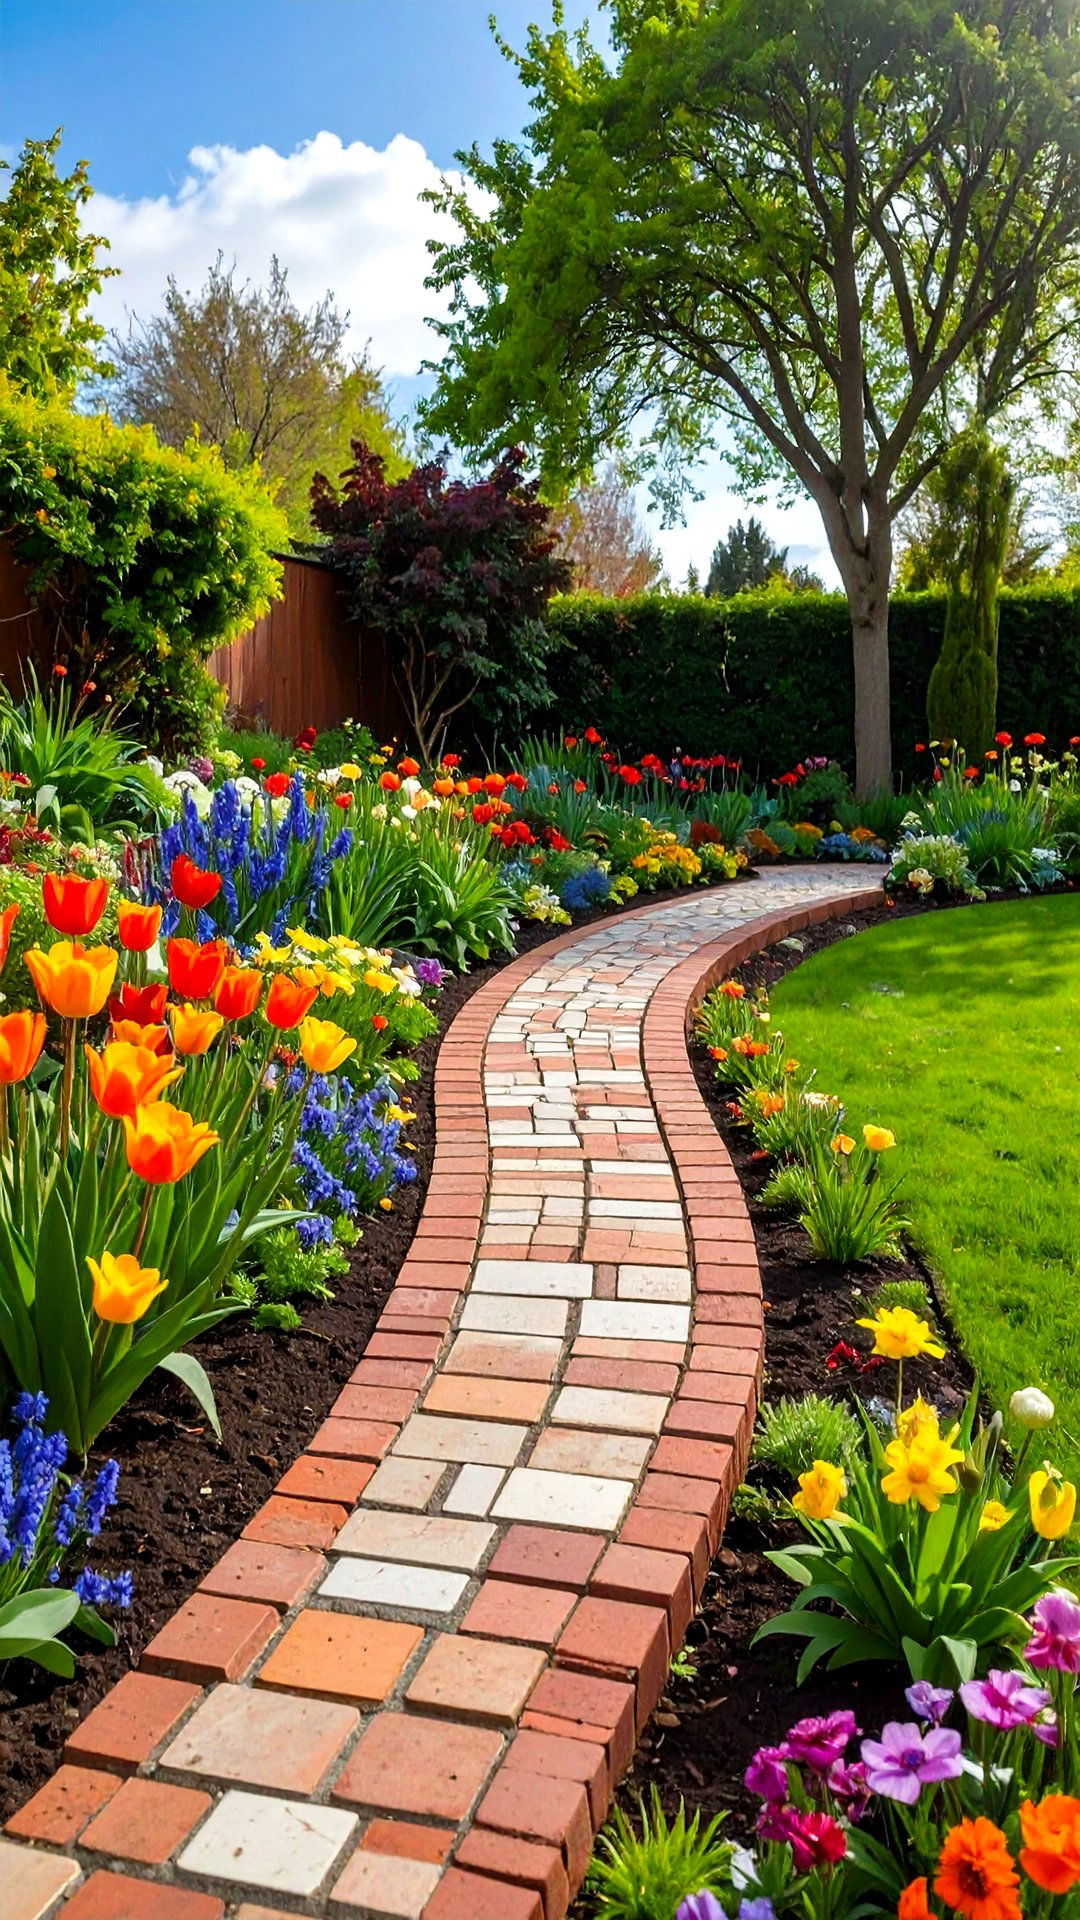
Another way to turn a border into art is by composing a brick mosaic edging with off-cuts and broken pieces. Arrange shards in flower, star, or geometric motifs inside a shallow formwork, then pour a thin mortar bed to lock them in place. Because the pieces vary in thickness, tamp gently to create a nearly level top that still shows texture. Use contrasting brick colors or even mix in bits of tile for sparkle when sunlight hits. The finished mosaic transforms a utilitarian edge into a conversation starter and makes clever use of leftovers that would otherwise be discarded.
16. Terraced Brick Edging on Slopes
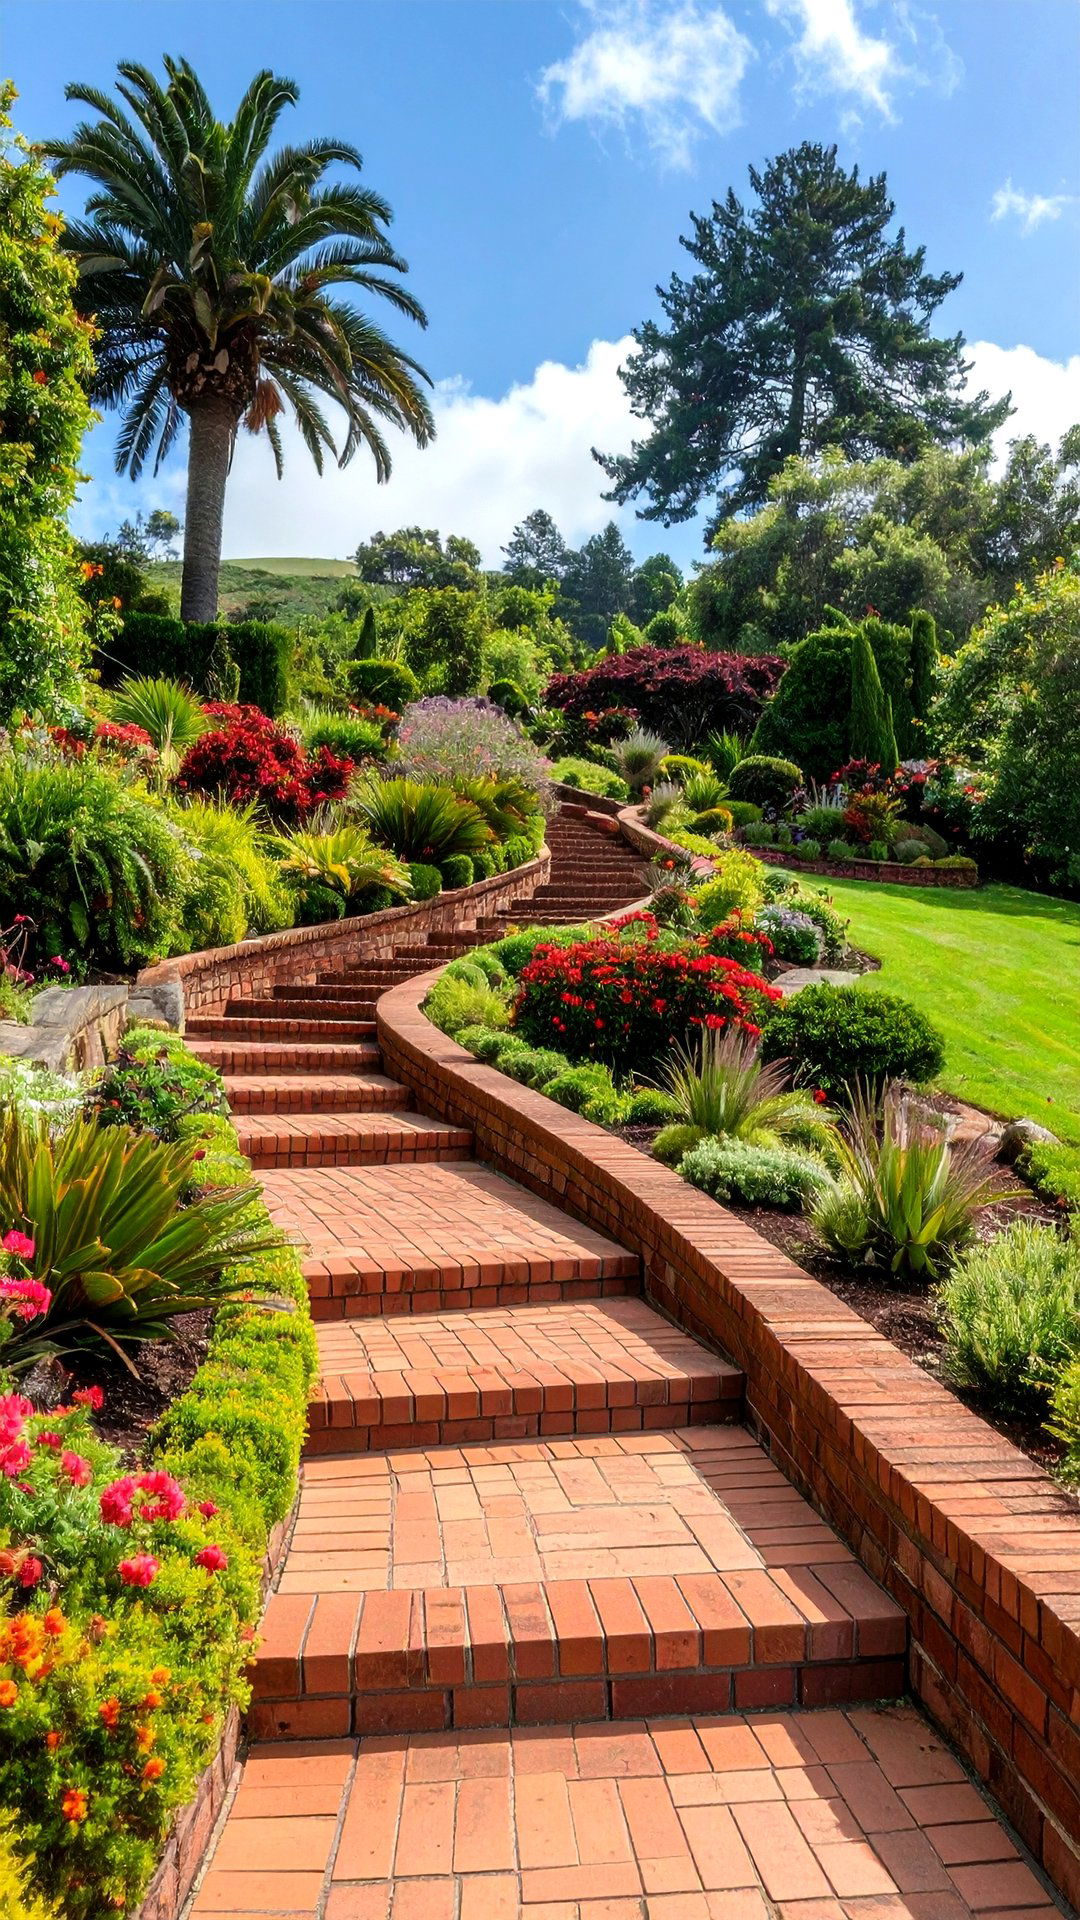
Despite challenging slopes, terraced brick edging lets you carve tidy, level beds into a hillside. Build a series of short retaining risers, stepping each course back the width of a brick to form miniature shelves. Backfill every tier with soil and mulch before starting the next to minimize pressure. The staggered bricks create natural drainage weep holes, preventing water from pooling behind the wall. On steep gradients, drive rebar stakes through occasional vertical joints and fill the cavity with concrete for extra rigidity. Plant cascading groundcovers on the top tier to soften edges and knit the structure visually into the landscape.
17. Circular Brick Edging Firepit Rim
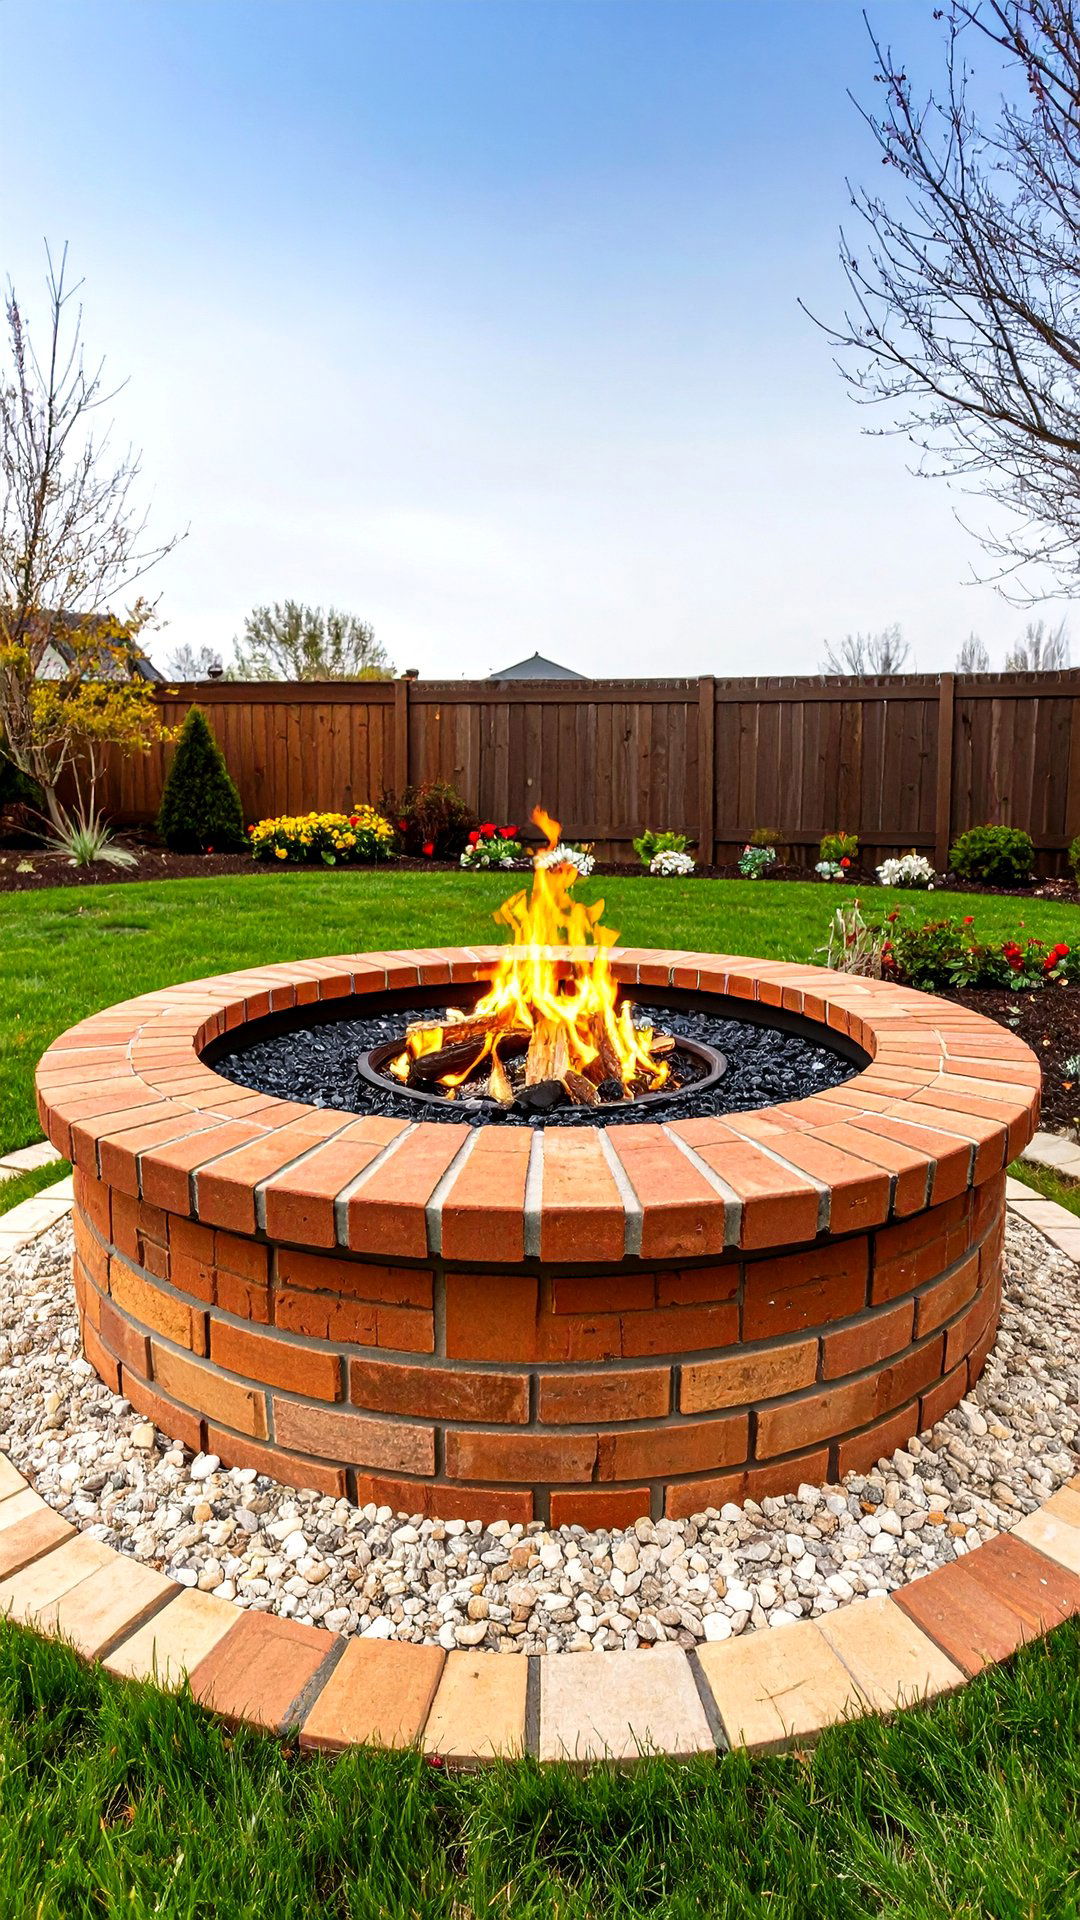
With outdoor gatherings booming, a circular brick edging around a firepit keeps gravel tidy and toes safe. Set the first ring of bricks flat on compacted sand, measuring equal radii from a central stake to maintain symmetry. Add a second soldier-course on edge for extra height, staggering joints to lock the circle. Leave a narrow gap at the lowest point, filled with pea stone, as a discreet drain for rainwater. Because heat can crack mortar over time, choose fire-rated adhesive or leave dry joints so bricks can expand. Finish by topping the interior with crushed granite for spark control.
18. Spiral Herb Garden Brick Edging
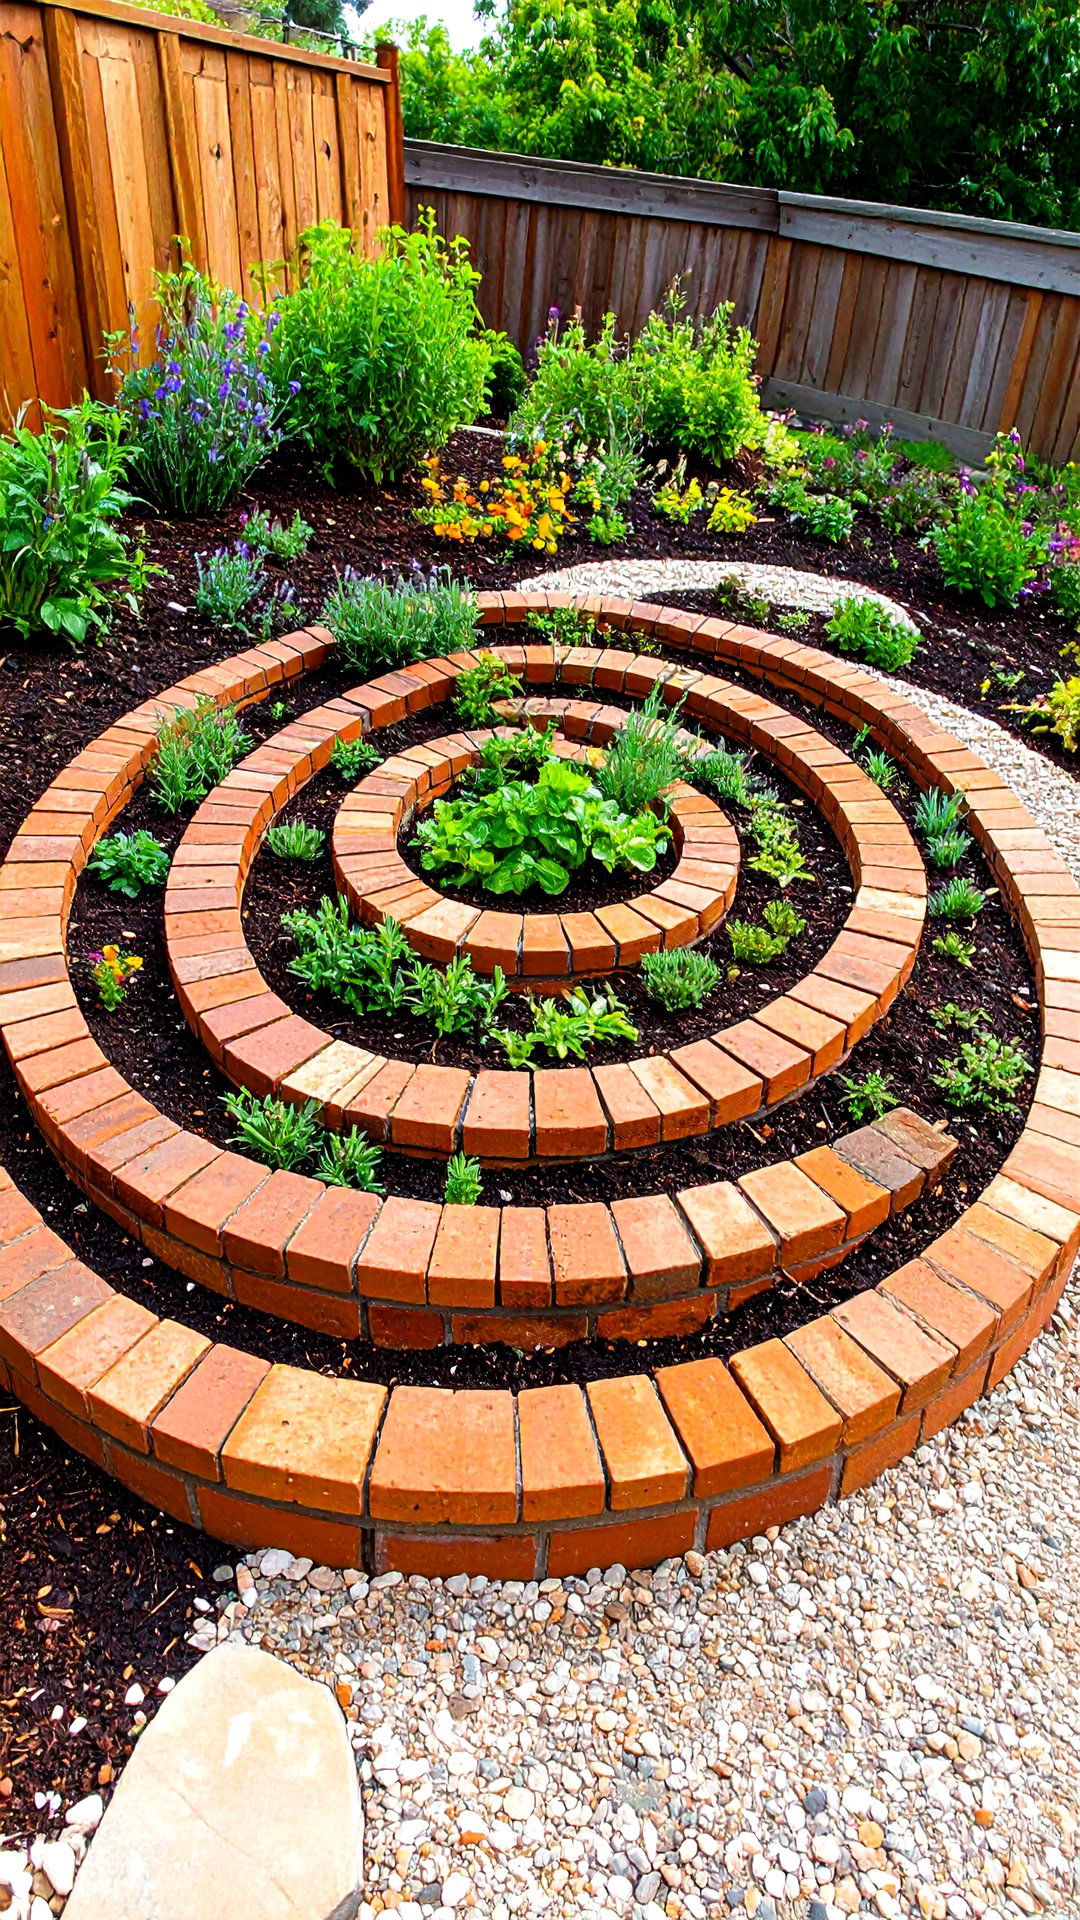
In small kitchen gardens, a spiral herb bed edged with bricks packs surprising growing space into little more than a square meter. Start with a circle of bricks laid flat, then continue stacking toward the center, offsetting each course so the wall rises gradually and forms a corkscrew path. The base stays moist for mint, while the sunny summit suits rosemary — microclimates created by mere centimeters of elevation. Fill the structure with well-draining soil mixed with compost, watering thoroughly to settle. A final layer of gravel on the walkway reduces mud and invites children to explore the aromatic helix.
19. Tiered Brick Edging Seat-Wall
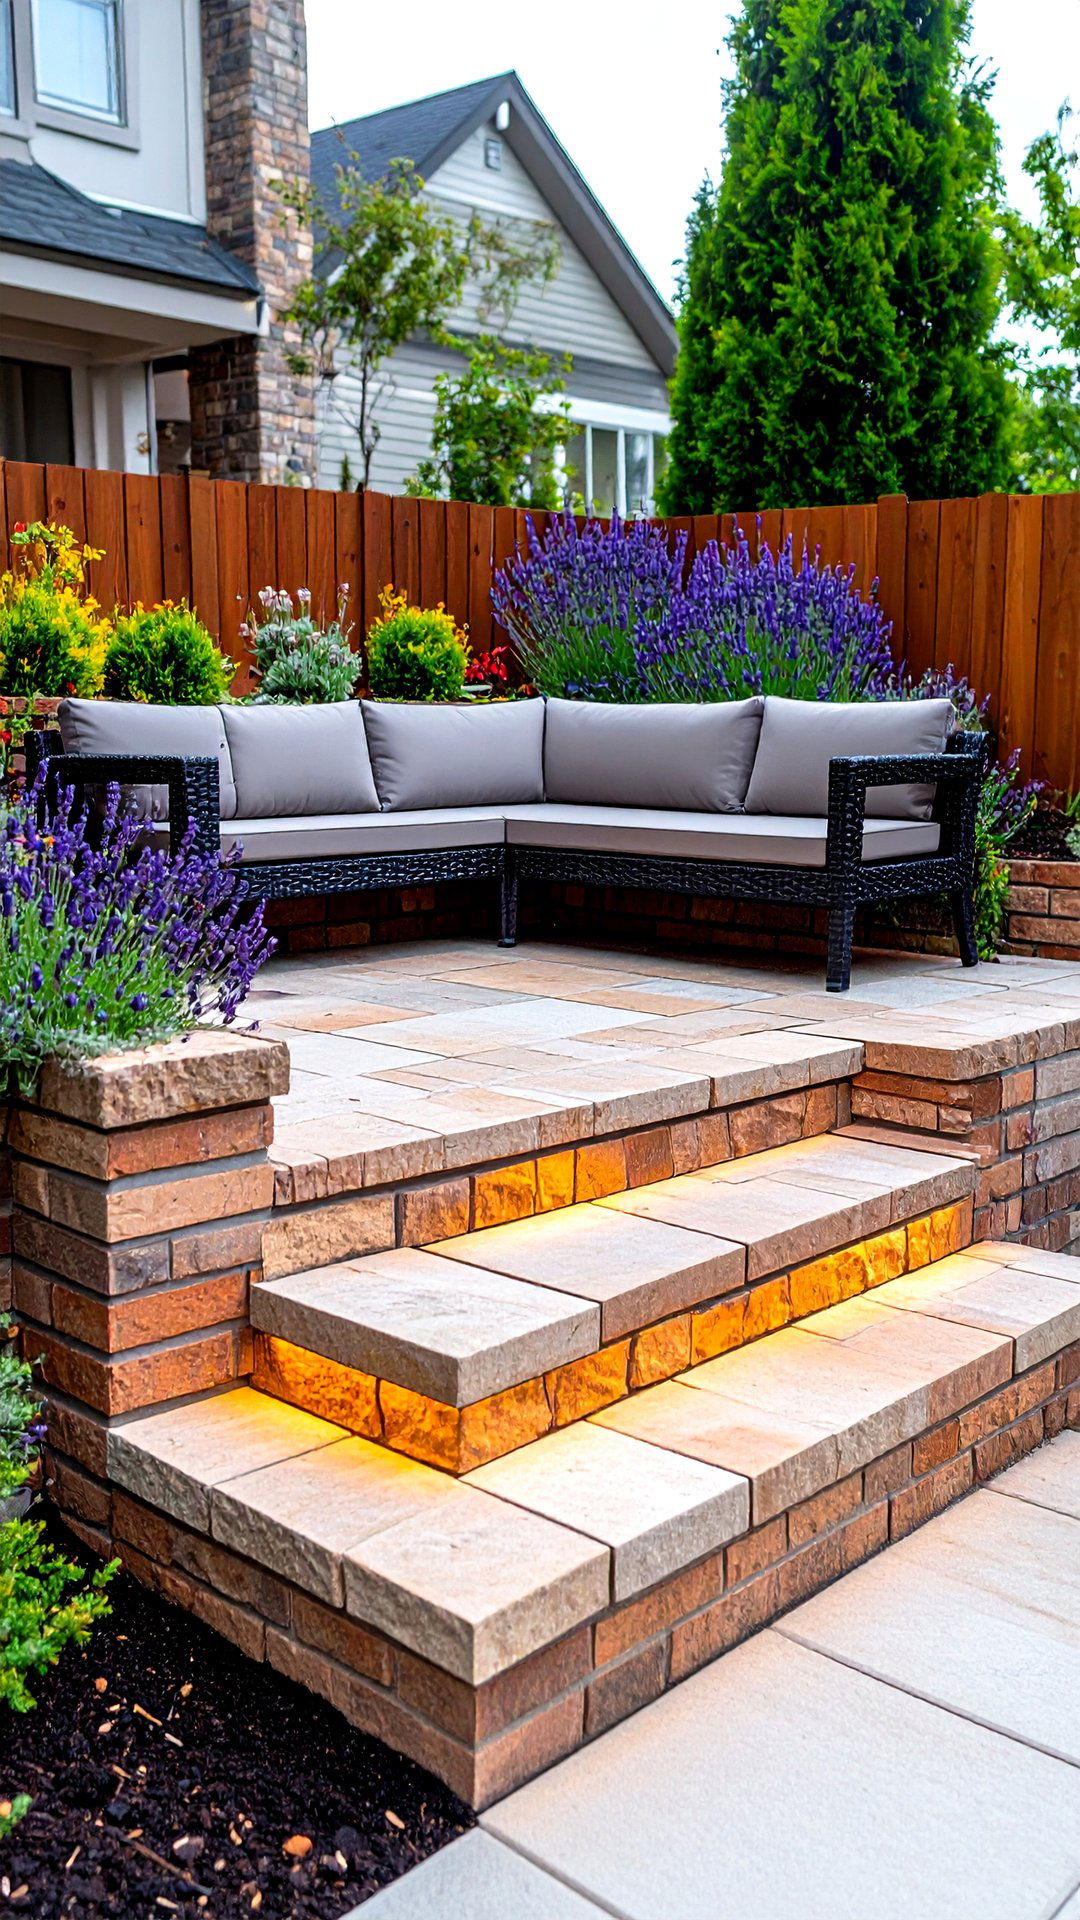
By contrast to low borders, a tiered brick edging seat-wall turns containment into functional garden furniture. Build the first two courses as a retaining edge, then set a third wider coping course that projects inward four inches to form a bench. Choose bull-nose bricks for comfort and secure them with frost-resistant mortar. Inside the bed, plant fragrant shrubs like lavender so sitting guests brush past soft foliage. Integrating a 12-volt LED strip beneath the coping produces subtle night lighting without glare. The dual-purpose design maximizes a tight patio footprint by merging seating, structure, and visual rhythm in one element.
20. Checkerboard Brick Edging Color Mix
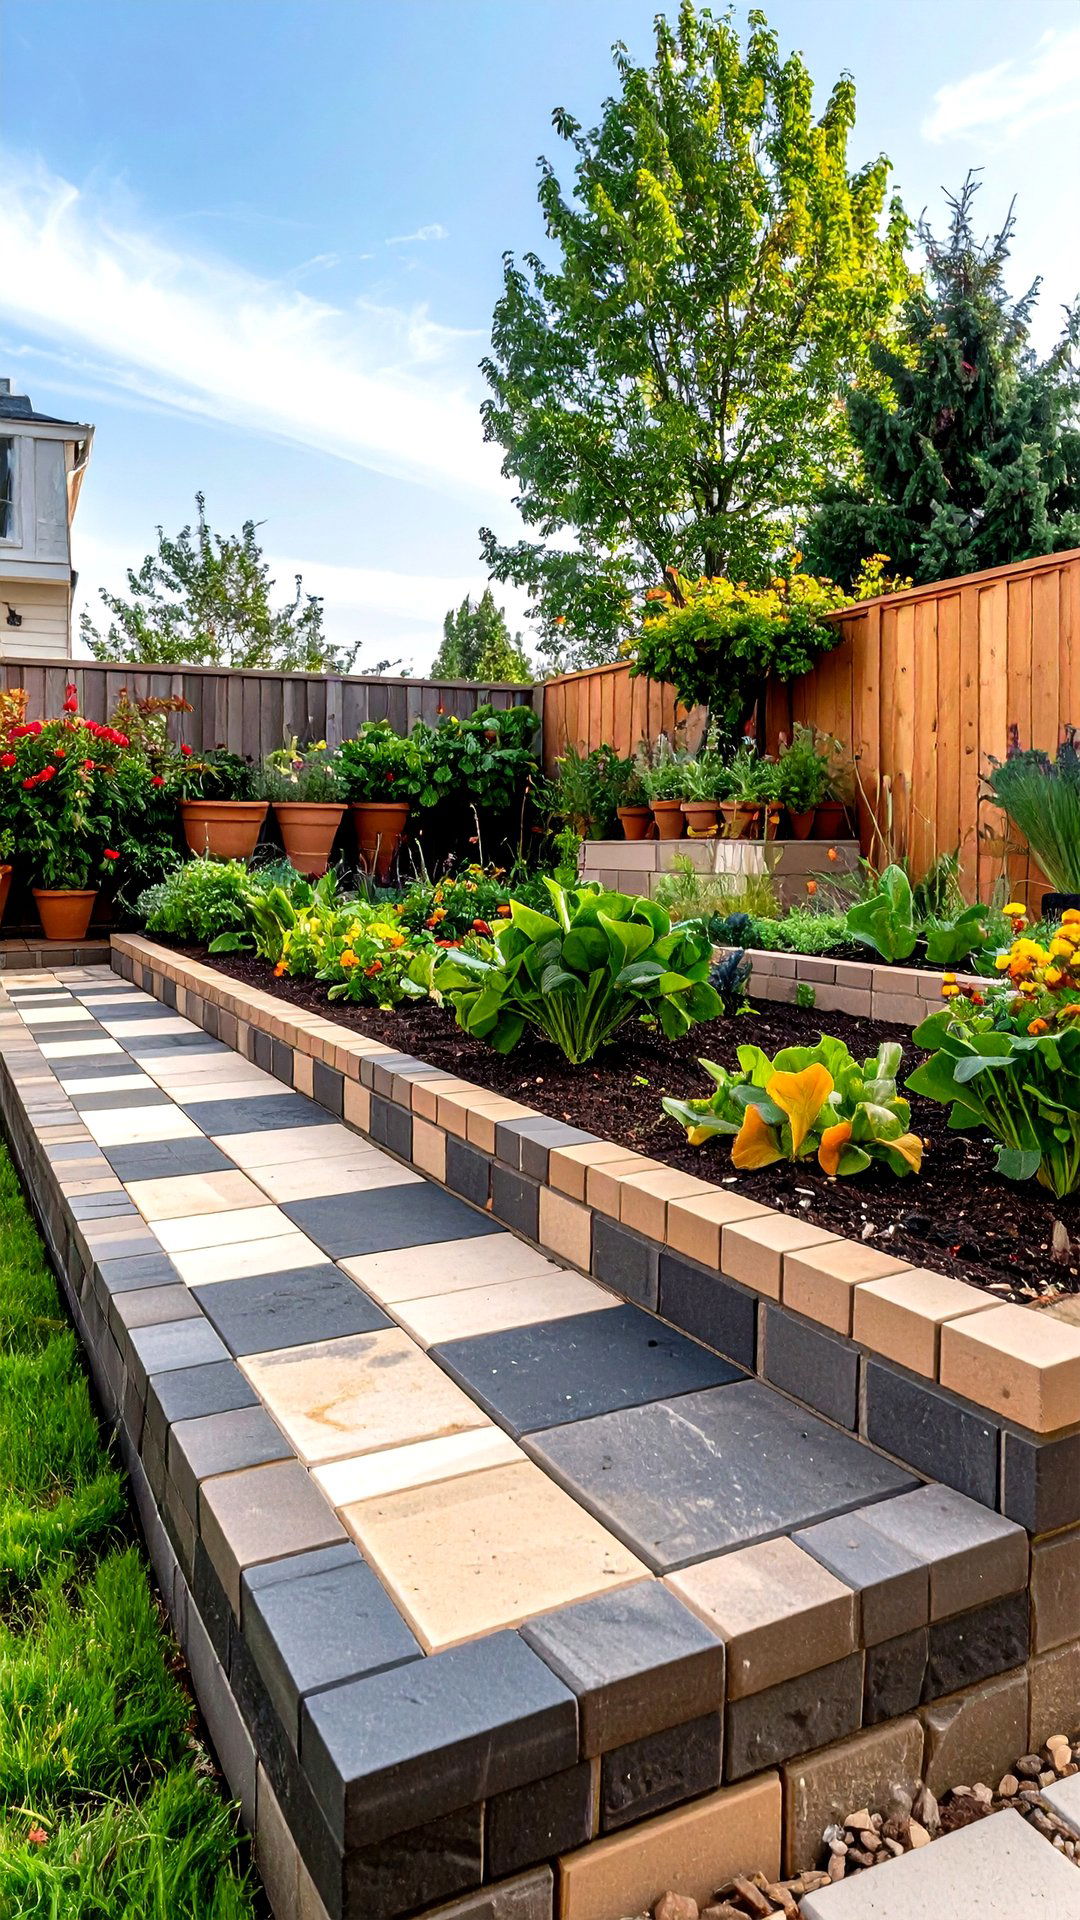
Although bricks often come in standard reds, a checkerboard brick edging mixes two shades to create playful contrast. Alternate deep charcoal and buff bricks every other unit, keeping the pattern consistent around the perimeter so the visual tempo reads intentional. This technique works best with flat-laid bricks and sharp ninety-degree corners, such as square vegetable beds. Seal the surface with a breathable product to prevent color fade in harsh sun. Because the alternating colors act as a scale reference, small gardens can appear larger, much like a tiled foyer. Finish by echoing one of the shades in planter pots for cohesion.
21. Water-Feature Rim Brick Edging
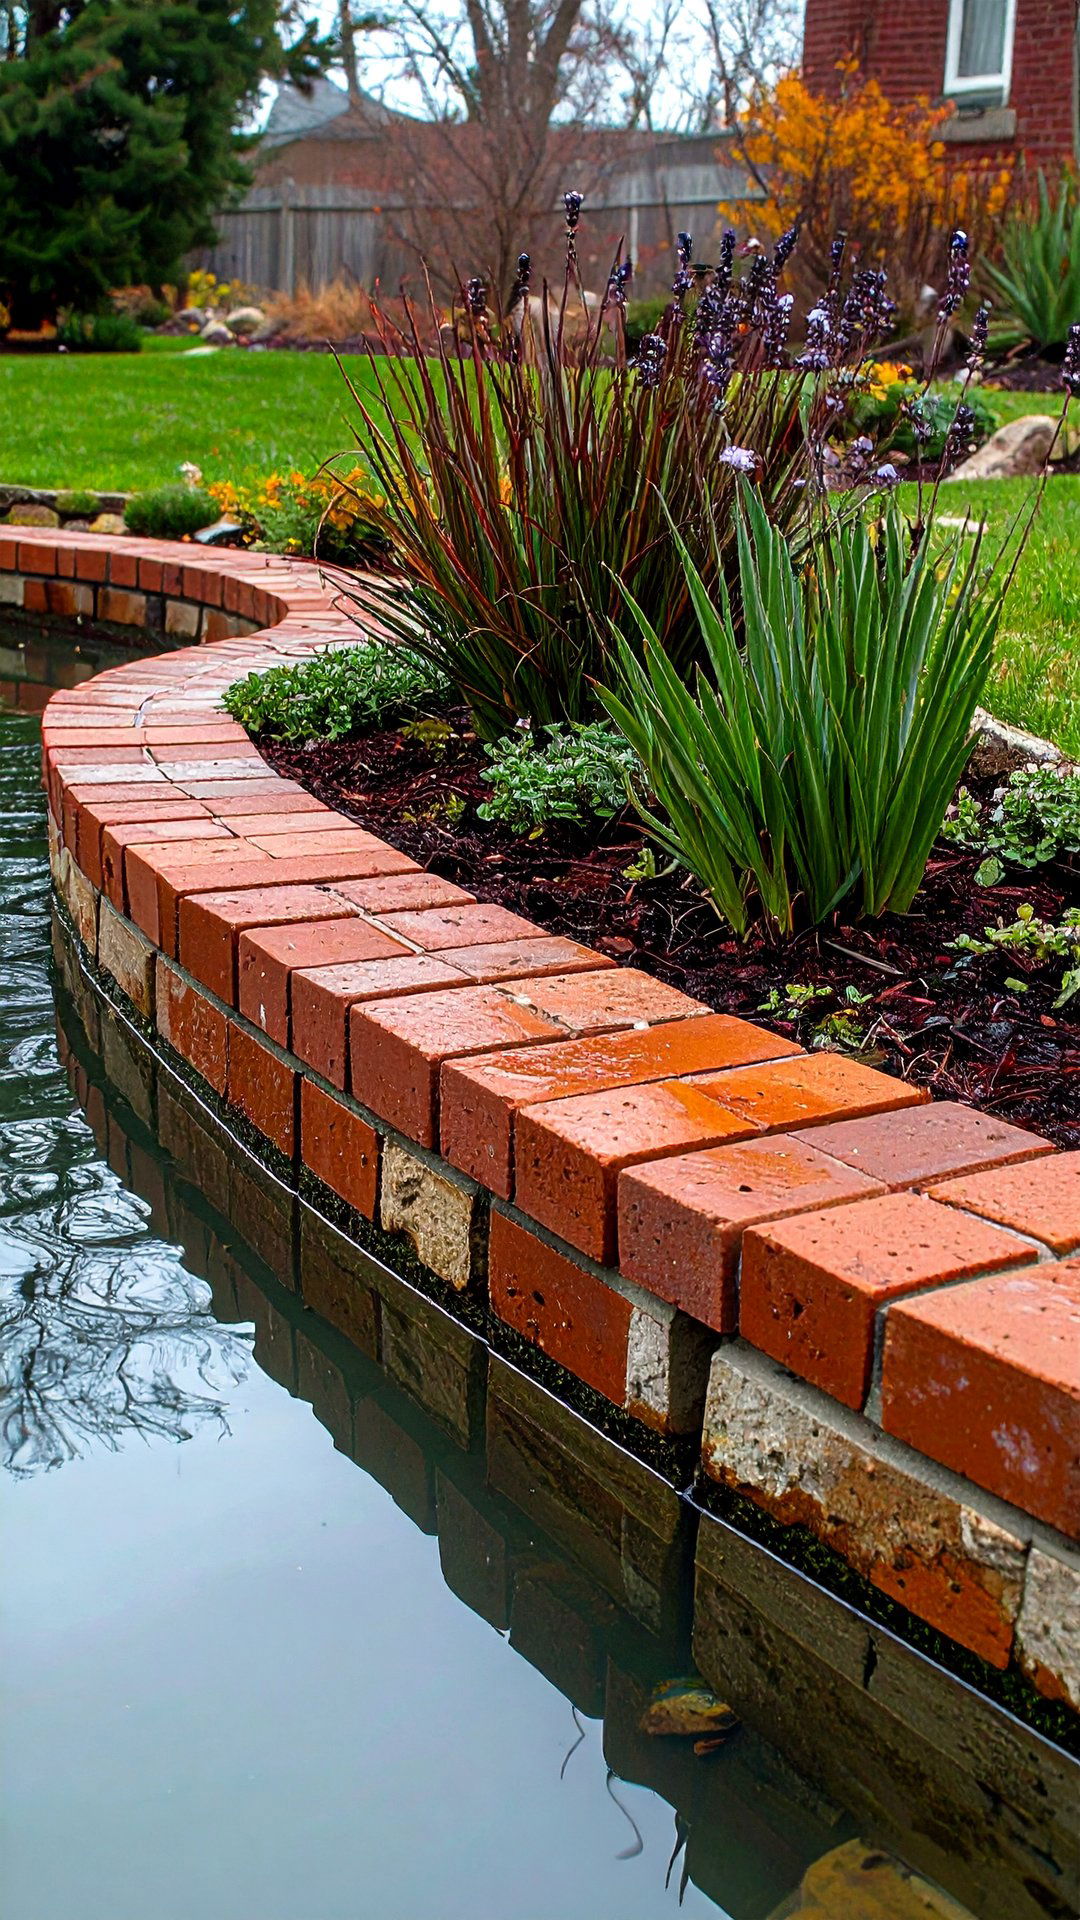
Bringing brick edging to the edge of a pond or rill delivers a tidy, slip-resistant rim that hides liner folds. Set the first course half on land, half cantilevered over water, supported from beneath by a row of concrete blocks laid flat. The bricks shield the pond liner from ultraviolet light, extending its life, and provide a comfortable perch for frogs or gardeners. Use a latex-modified mortar for submerged joints, and slope the brick slight outward so rainwater drains away from the pool. Finally, tuck creeping thyme into small gaps; its roots stabilize the grout while aromatic foliage softens hard lines.
22. Living Brick Edging with Groundcovers
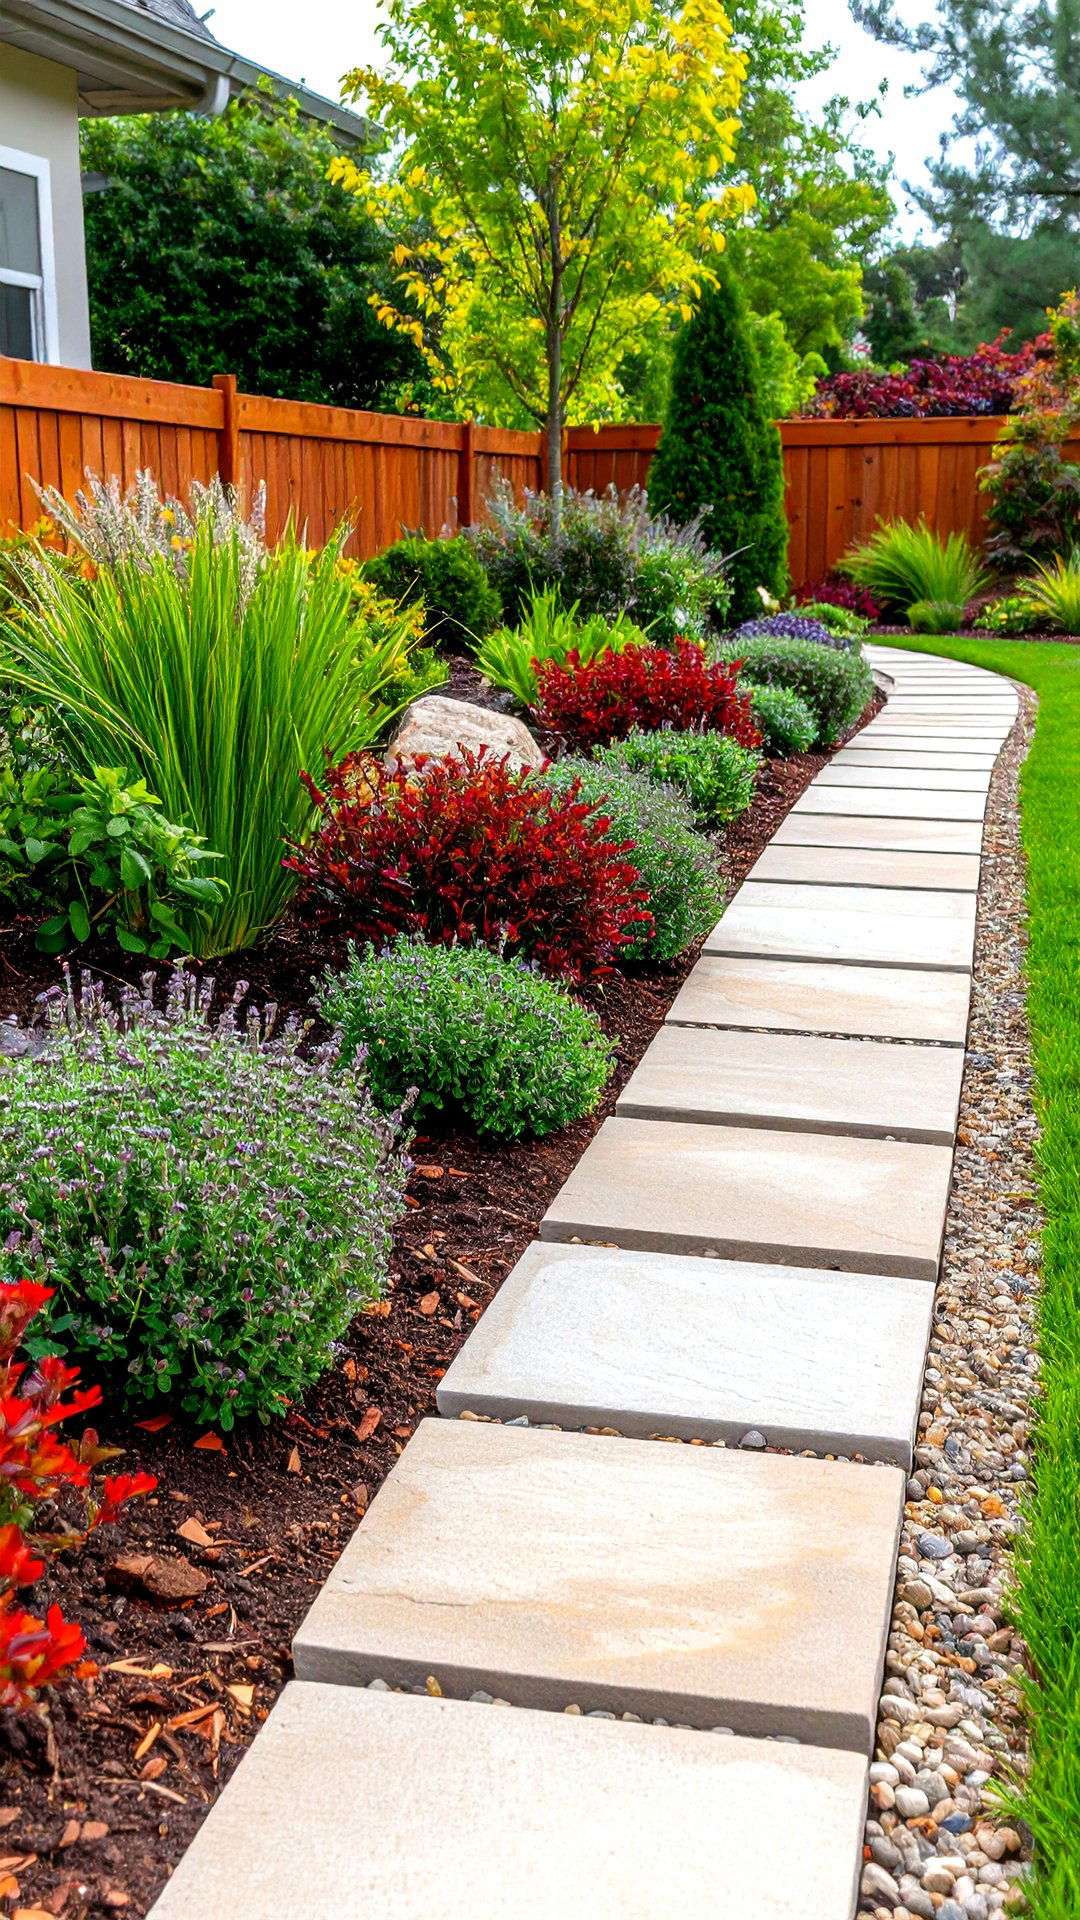
According to low-maintenance garden experts, teaming brick edging with tough groundcovers can slash weeding time and add a living fringe of color. After the bricks are installed, tuck plugs of creeping thyme or dwarf mondo grass into the narrow soil strip directly behind the edge. As plants knit together, they smother weeds and stop mulch from spilling onto paths — a key tip highlighted by Homebuilding & Renovating when recommending gravel containment. Choose species that stay under three inches tall so the brick face remains visible and mowing remains hassle-free. An annual shear keeps the green carpet neat and reveals the edging again.
23. Child-Safe Rounded Brick Edging
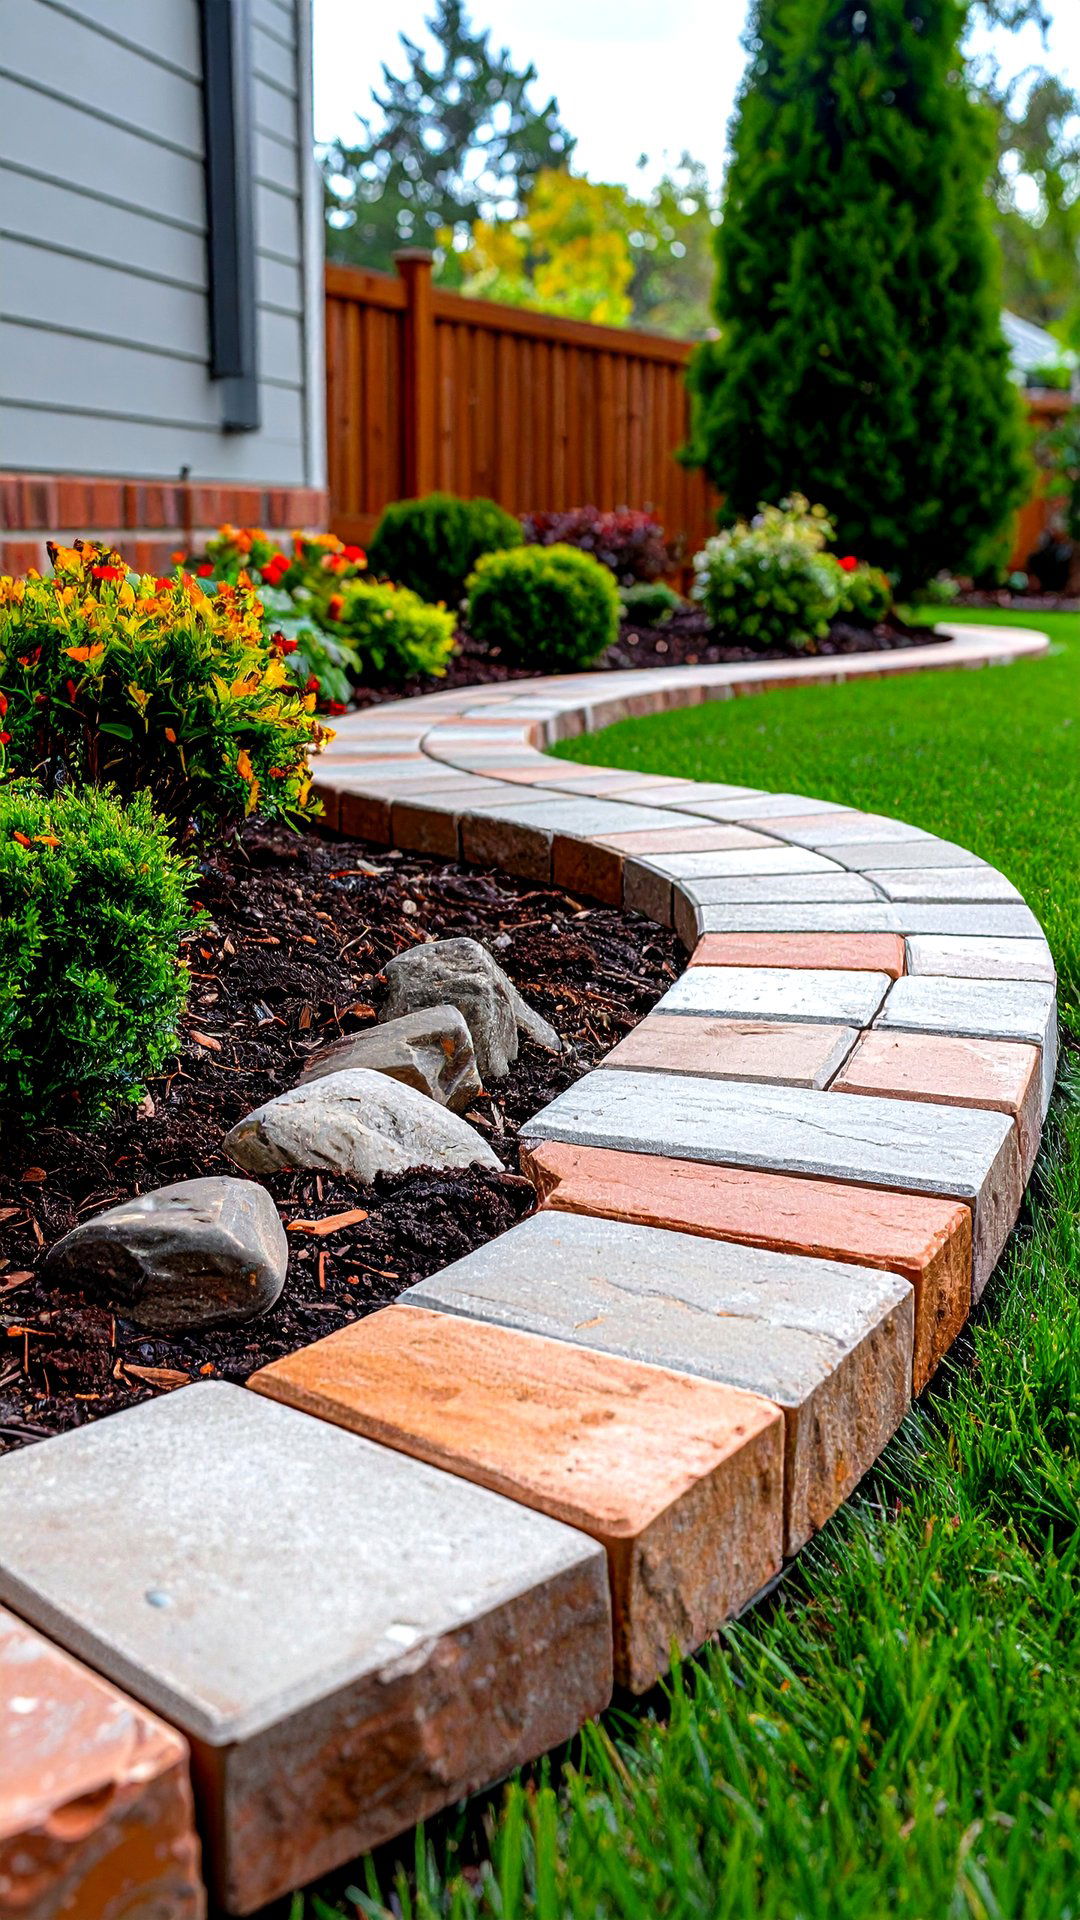
Nevertheless, families with small children may prefer rounded brick edging that eliminates sharp corners and trip hazards. Use specially molded bull-nose or radius bricks laid flat so each face gently curves upward; the smooth profile means scraped knees are less likely during lawn games. Extend the buried portion deeper — at least five inches — to prevent tipping if a soccer ball slams the border. Where curves tighten, cut bricks with a masonry saw instead of forcing wide joints. For extra safety, sweep polymeric sand into gaps and mist lightly so it locks hard, stopping little fingers from dislodging pieces.
24. Tech-Smart Brick Edging with Sensors
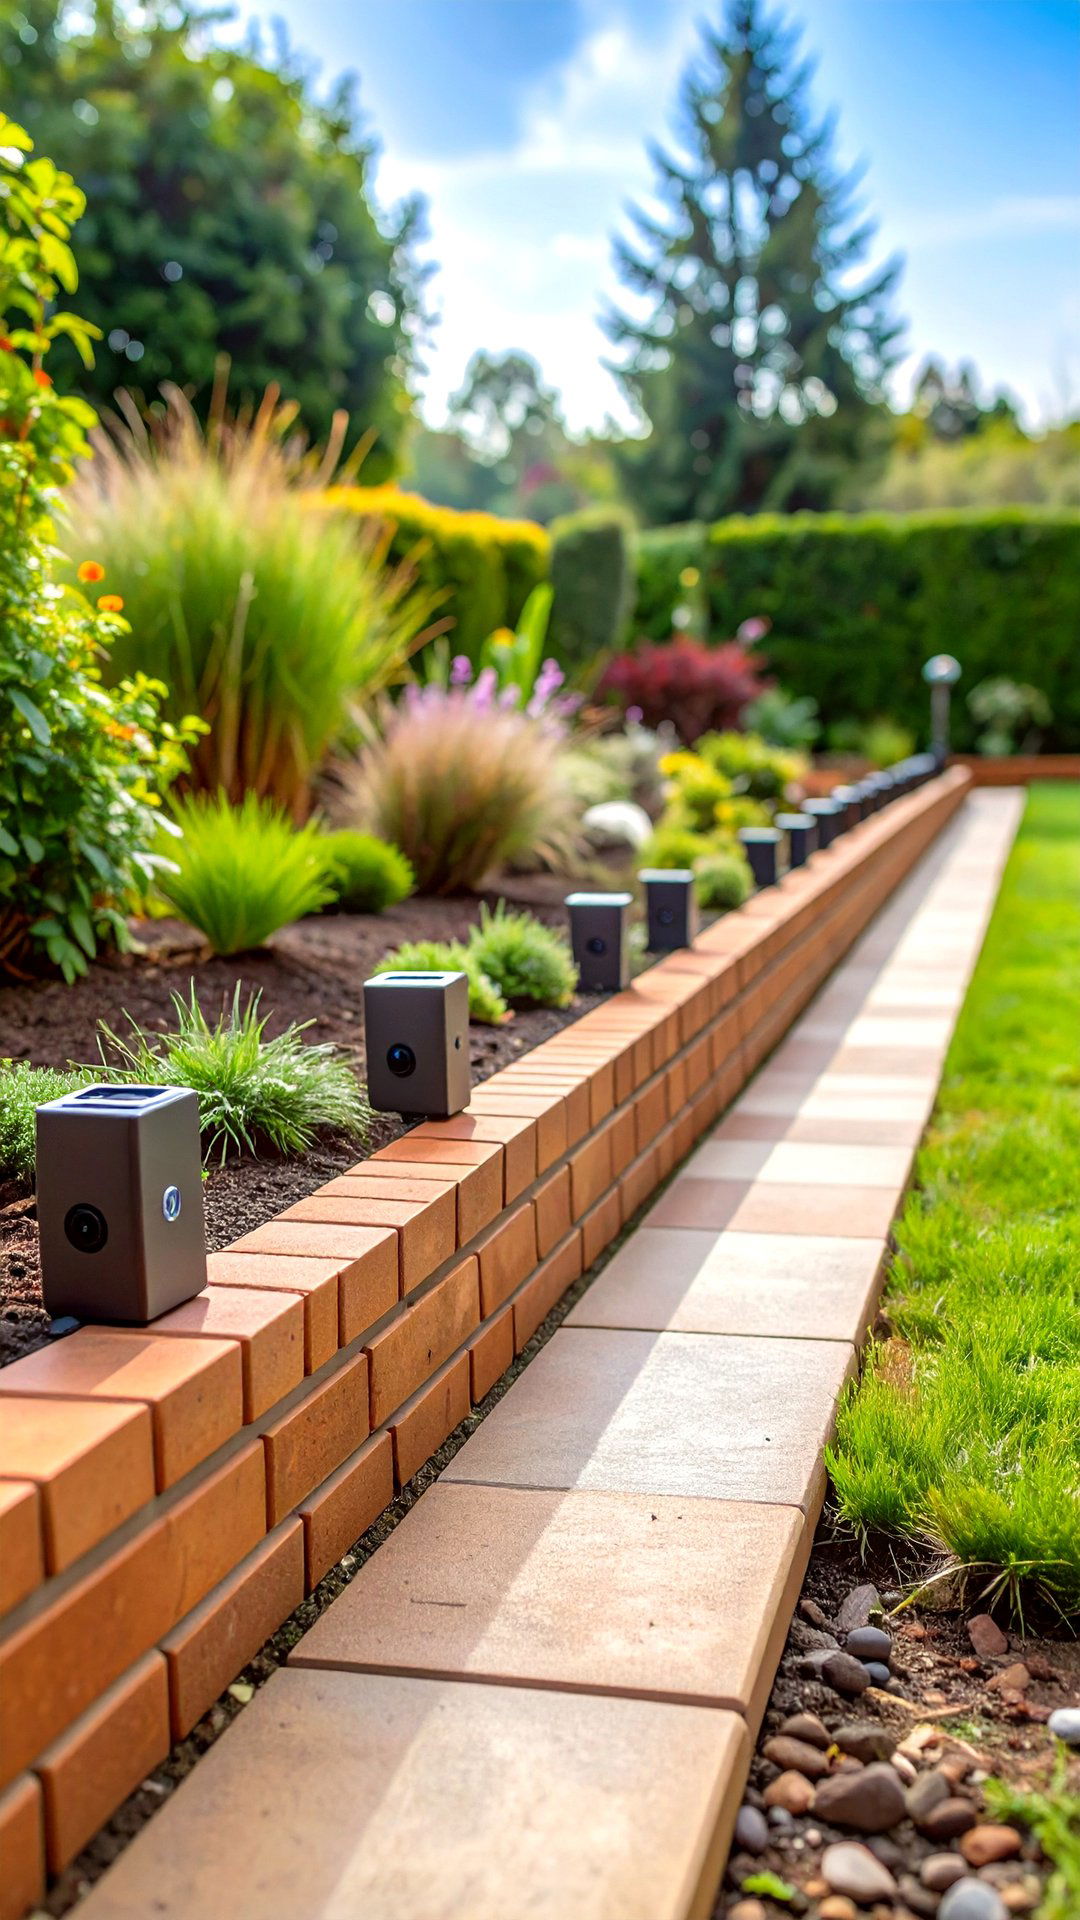
To future-proof your landscape, tech-smart brick edging now comes with embedded moisture sensors and Bluetooth beacons. The bricks look ordinary, but tiny perforations hide low-profile probes connected to coin-cell batteries sealed in resin. Pair them with a smartphone app to receive real-time soil-humidity alerts, prompting precise irrigation instead of guesswork. Because the electronics sit above the damp sub-base, replacement is as simple as swapping a brick when the battery expires in several years. While costs are higher upfront, reducing water use and preventing over-watering stress can repay the investment quickly, especially in drought-prone climates.
25. Statement Entryway Brick Edging Threshold
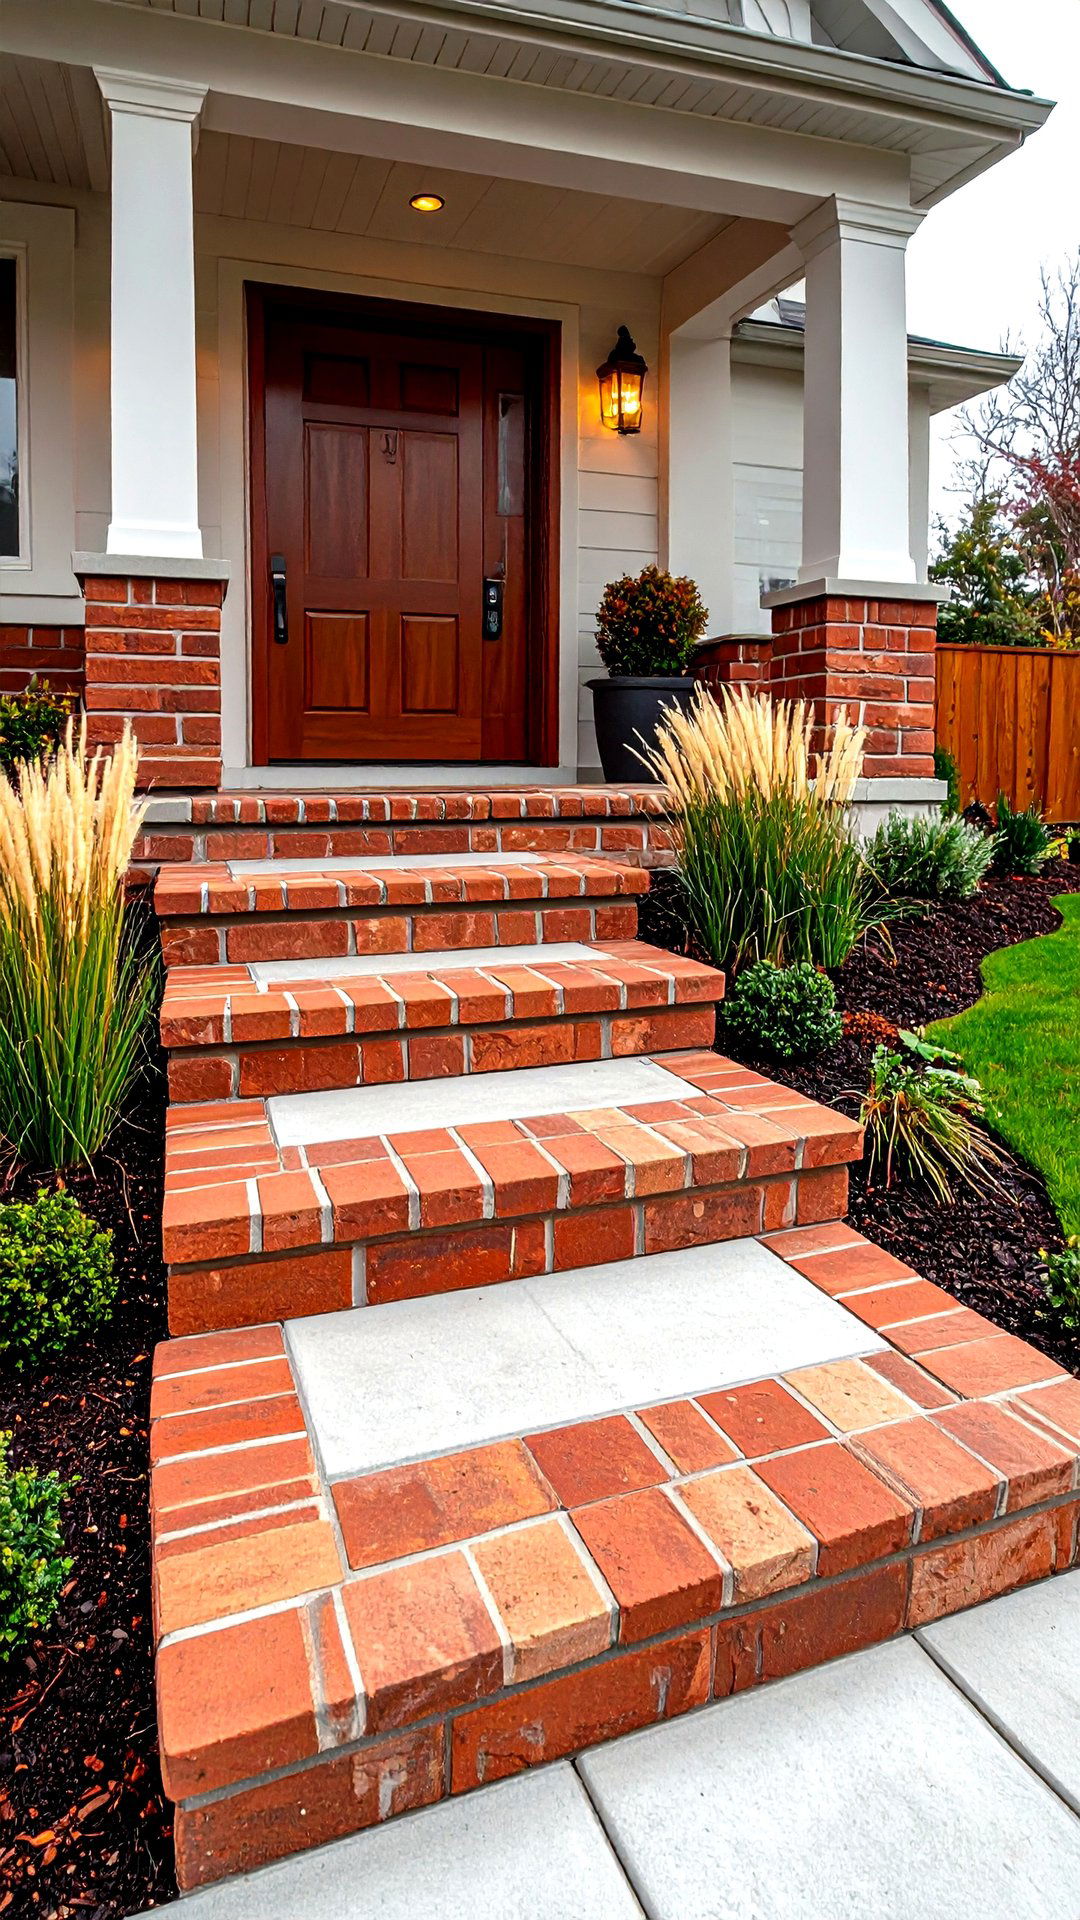
Finally, a statement entryway threshold in brick edging announces the garden’s style the moment guests arrive. Double or triple the border width along the front walk, angle bricks toward the house to create a gentle visual funnel, and inlay a house number with contrasting pavers for a bespoke touch. Flanking planting pockets filled with upright grasses further emphasize the transition from public sidewalk to private sanctuary. Because the edging frames traffic zones, choose bricks rated for freeze-thaw cycles and secure them with mortar on a concrete footing. A quick sweep keeps the threshold pristine and the welcome unmistakable.
Conclusion:
Brick edging, whether laid flat, stood upright, stacked high or wired to a smartphone, proves that small design moves can deliver big returns. The ideas above show how a single material guides feet, tames soil, channels water and lights the night while reflecting any style from rustic farmhouse to minimalist modern. Choose one concept that fits your site, gather a level and a mallet, and a weekend later you’ll have a border that looks purposeful and performs year-round. Few projects reward effort so quickly — or invite as many compliments — as a thoughtfully built brick edge.








Leave a Reply